General Settings Configuration Guide
Marketing Cloud: General Settings Configuration Guide
The Events, Campaigns, Email Marketing, Live Chat, Surveys, Marketing Automation, and Scoring apps in CloudOffix Marketing Cloud are pre-installed. However, to optimize their performance and align them with specific business processes, certain configurations must be made within the General Settings menu (Settings > General Settings) or the relevant apps’ internal configuration options.
This guide outlines the General Settings for each app, emphasizing critical configurations that are essential for functionality.
1. Events App General Settings
The Events app serves as the foundation for event management in CloudOffix Marketing Cloud.
Key General Settings:
Events:
-
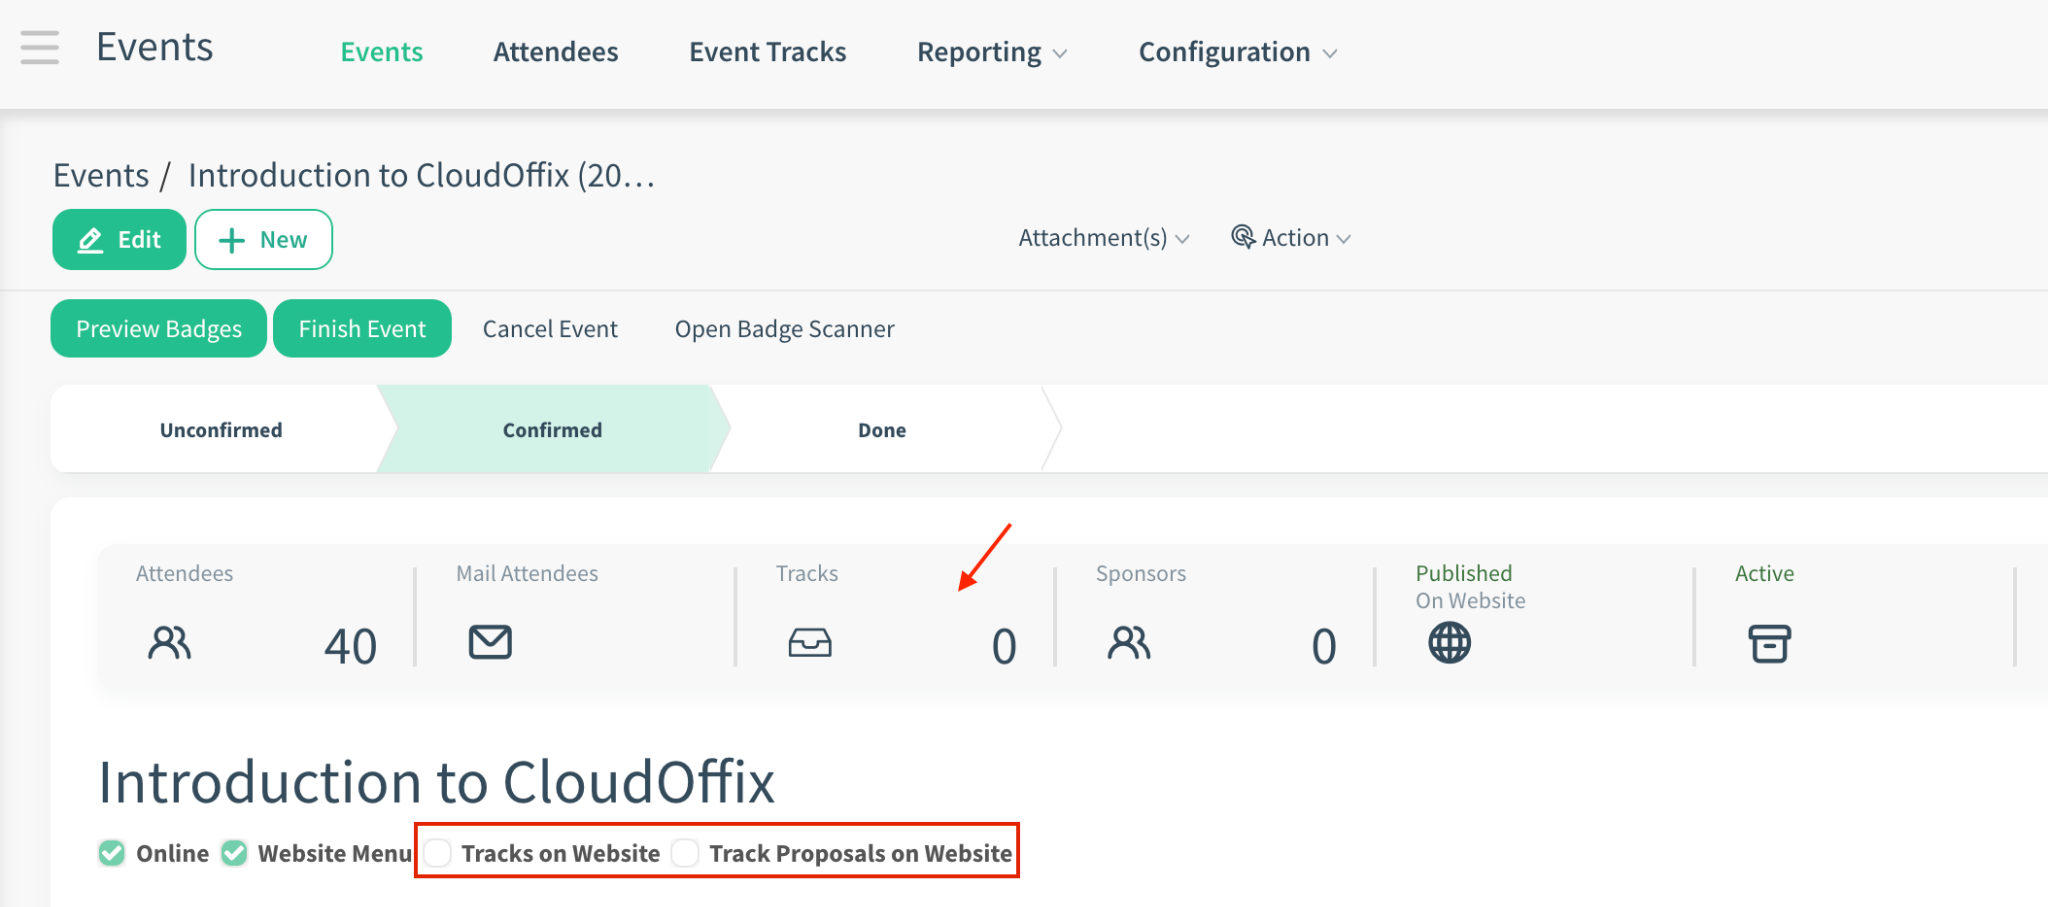
Schedule & Tracks: Allows organizers to create multiple tracks/sessions within an event (different rooms, simultaneous sessions, agenda with speakers).
When enabled, a new stat button and checkbox appear on the event form for managing tracks.
Track on Website: Displays the full agenda/schedule (tracks & sessions) on the public event page.
Track Proposals on Website: Speakers who would like to participate in the event as talkers can submit their talk proposals along with their biography and talk introduction or people who would like to propose talkers for the event can fill out the form on the website.
Registration:
-
Tickets: Activates the ability to create paid or free tickets for events. You can sell tickets with sales orders and follow them in the Sales Cloud Sales App, under Orders > Quotations.
Note: Enabling this option will automatically enable the ‘Online Ticketing’ option and disabling will disable the ‘Online Ticketing’ option.
-
Online Ticketing: Enables online payment for tickets directly on the event website.
If disabled, the tickets cannot be sold online. On the event website, registration becomes free for attendees.
Note: Ticket sales generate a sales order and therefore require the Sales Cloud (Sales app) to be installed. The ‘Tickets’ and ‘Online Ticketing’ options will appear in the Events app’s General Settings only when the Sales Cloud Sales app is available. If Sales Cloud is not installed, these options will not be listed or visible in the Events app’s General Settings.
Questions: Allows you to add custom registration questions (e.g., T-shirt size, dietary restrictions, job title). Questions will be asked to attendees when they are registering online.
2. Email Marketing App General Settings
The Email Marketing app, allows you to create, send, track, and optimize mass email campaigns, manage subscriber/mailing lists, and integrate subscription tools like website popups.
Key General Settings:
Email Marketing:
Mass Mailing Campaigns: Manage campaigns of mass emails with process stages (e.g., Design)
Mailing Lists:
-
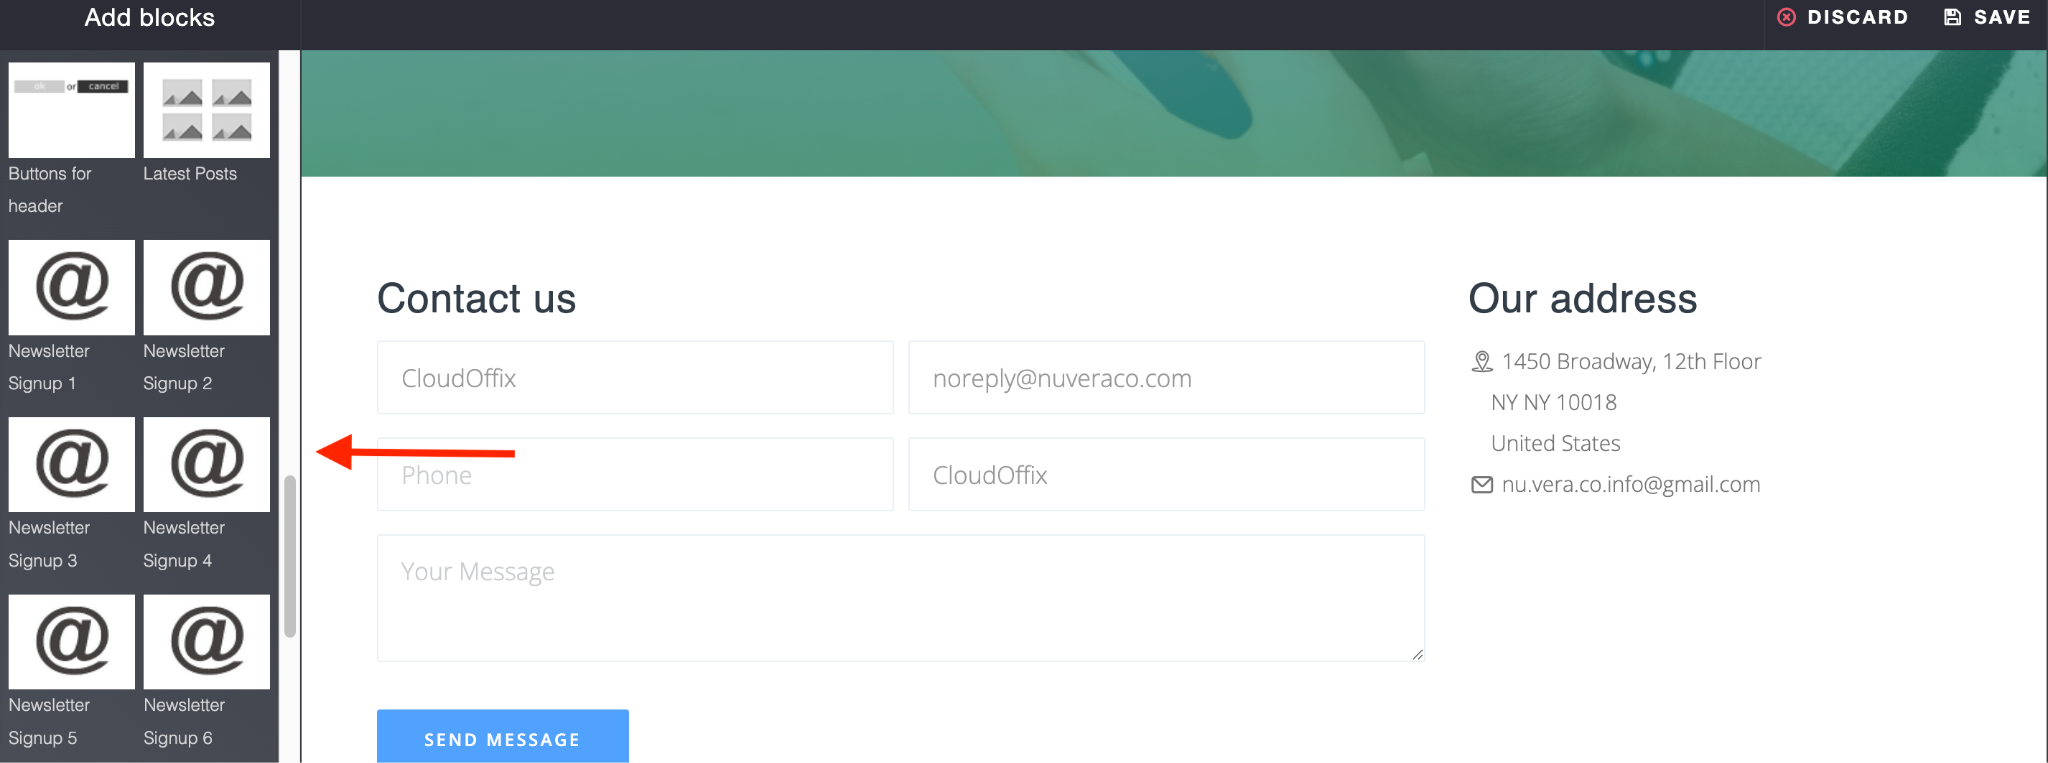
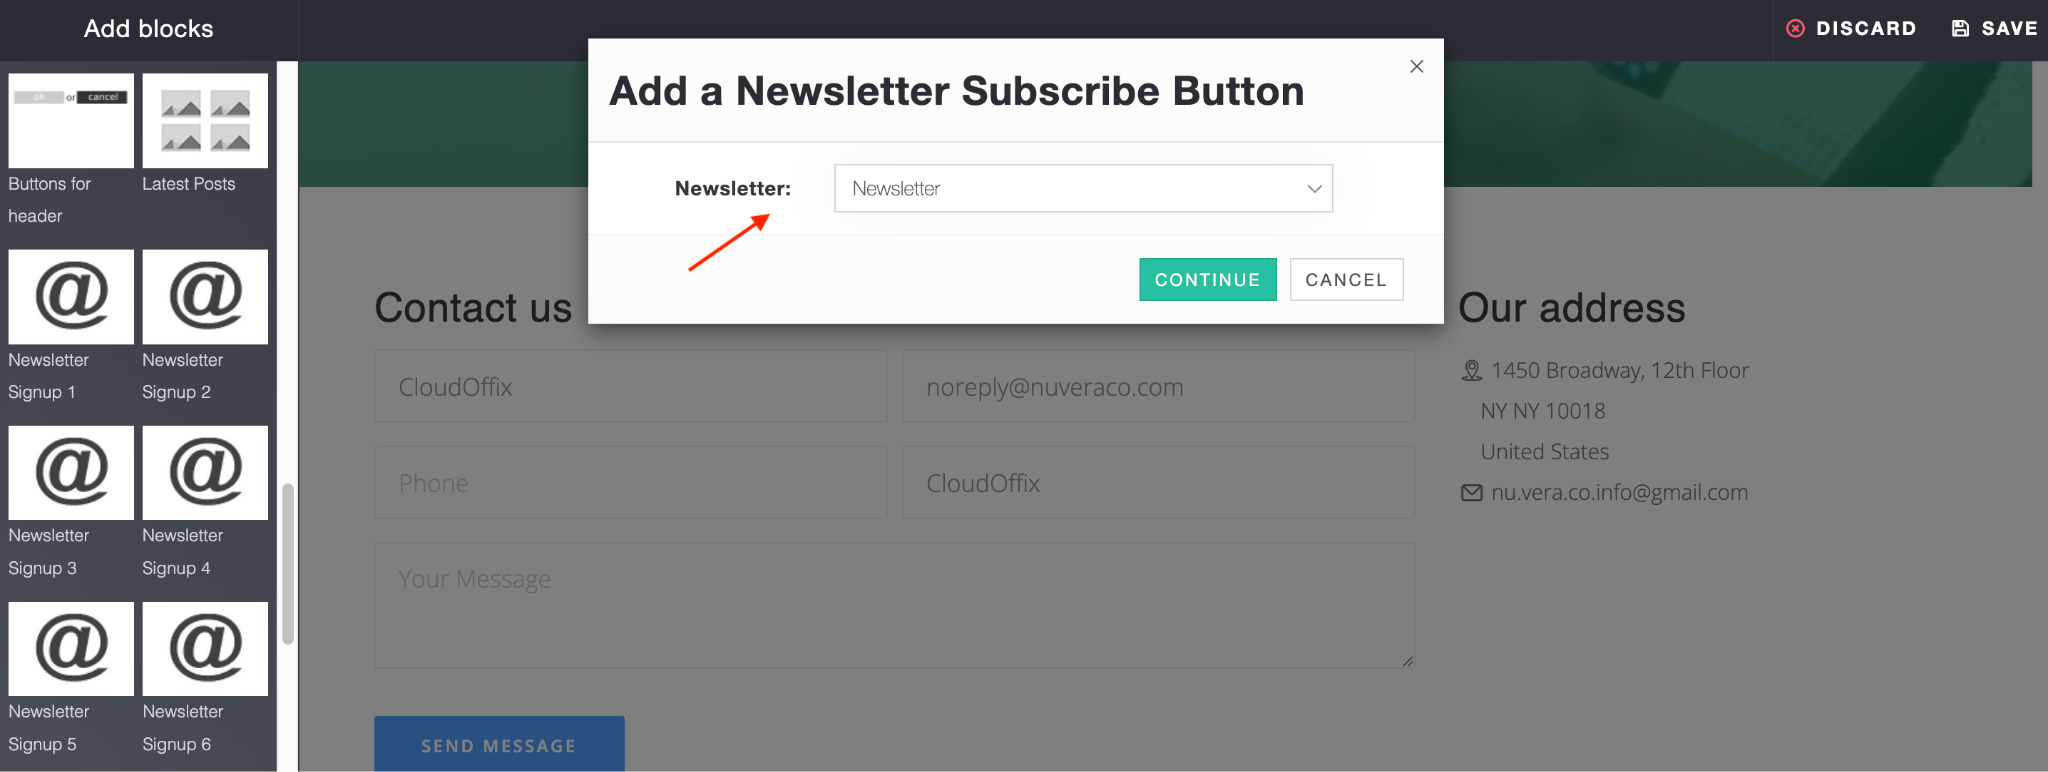
Website popup: This adds a new Newsletter Popup snippet to drag & drop on on your website pages. It triggers a popup when visitors land on the page. This popup prompts them to enter their email address to join a mailing list.
By dragging and dropping the desired design (e.g., Newsletter Signup 1, Newsletter Signup 2) onto your website and selecting the target mailing list from the dropdown menu, you can easily add a website popup that allows visitors to subscribe to the selected mailing list.
Website app > Open your website (if the user has ‘Website / Editor and Designer’ access rights click ‘Go to Website; if the user has ‘Website /Restricted Editor’ access rights clicking the Website app will navigate them directly to the website itself) > Click ‘Edit’ > Drag & drop the relevant newsletter signup design from the left side > Select the target mailing list from the options.
The user must have at least Website / Restricted Editor access rights to be able to edit the website.
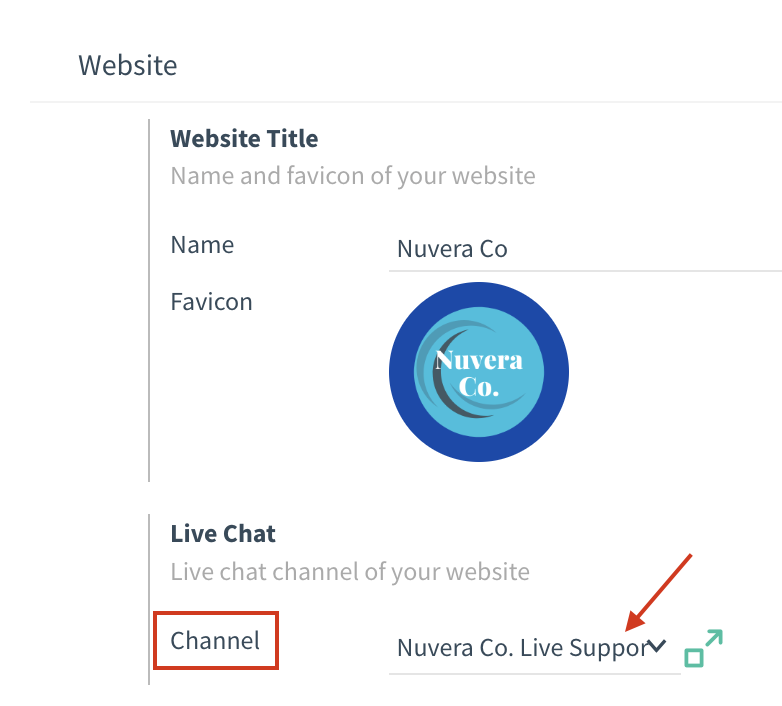
Note: The live chat channel that appears on your website is determined by the channel selected in the Website Configuration Settings (Website → Configuration → Settings → Live Chat section).
Whichever channel is chosen there (e.g., ‘Main Support Channel’) will be the one displayed on the live website — regardless of how many channels you have created in the Live Chat app.
Users with Website / Editor and Designer access rights can see the configuration menu, therefore, they can select which live chat channel is shown on the website.