
How to create CloudOffix user ?
CloudOffix User Creation Guideline
This document provides a comprehensive guide for creating and managing users in CloudOffix. Correct user creation is essential for ensuring security, maintaining proper access levels, and smooth business operations.
1. Introduction
1.1 Overview of CloudOffix User Management
At its core, user management ensures that employees, partners, or customers can access only the features and data relevant to their roles. Creating a new user in CloudOffix is a foundational task that sets the stage for secure and efficient operations.
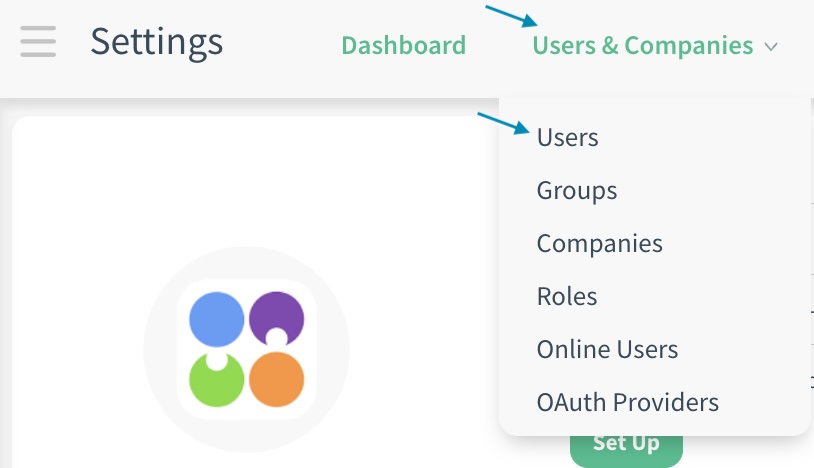
The user creation process involves defining a user's profile, assigning permissions via groups, and configuring login details. This is typically done through the 'Users & Companies' menu > Users in the Settings app. CloudOffix's user system is built on a flexible, group-based permission model, allowing granular control over what users can view, edit, or delete.
1.2 Importance of Proper User Creation
Incorrect user setup can lead to data breaches, compliance violations (e.g., GDPR, SOX), or operational inefficiencies. For instance, over-privileging a user might expose sensitive financial data, while under-privileging could hinder productivity. Proper creation ensures:
- Security: Least-privilege principle to minimize risks.
- Compliance: Audit trails for user actions.
- Scalability: Easy onboarding for growing teams.
2. Understanding User Types in CloudOffix
In CloudOffix, users are categorized into backend users and portal users. The public user is not a user type that is explicitly created; it represents anonymous access to public-facing features (e.g., website pages).
2.2 User Types in CloudOffix
Before creating a user, it is important to understand the available user categories and their functions.
2.3 Public User
- This user represents anonymous visitors browsing the website without logging in.
- The Public user is a system account and must not be created, modified, or assigned manually.
2.4 Backend Users
- Backend users are internal users/employees who require access to the CloudOffix backend interface. These users typically require detailed permissions and may be linked to employee records.
- They can log in to the main system and operate within modules based on their permissions.
- Access rights for backend users can be customized at module level depending on responsibilities
- Typical backend users may include:
- Human Resources Manager
- Sales Manager
- Sales Representative
2.5 Portal Users
- Portal users are external users, such as customers, suppliers, or service partners.
- These users log in through the Portal interface, which provides restricted access.
- Portal users typically view only their own records, such as:
- Quotations
- Sales Orders
- Invoices
- Support Tickets
- Portal users cannot access backend functionality.
★ User accounts should always be classified as Backend or Portal.
3. Backend User Creation
Backend users are internal employees or administrators with access to CloudOffix's full interface. The primary method is creating users via the Employees app.
3.1 Primary Method: Via Employees App
- From the app drawer, open the Employees app.
- Click Create to add a new employee.
- Fill in the necessary details such as:
- Name: Full name (e.g., 'Jane Smith').
- Work Email: Valid email (e.g., jane.smith@company.com).
- Job Position: Select or create a new position.
- Department: Link to a department for organizational hierarchy.
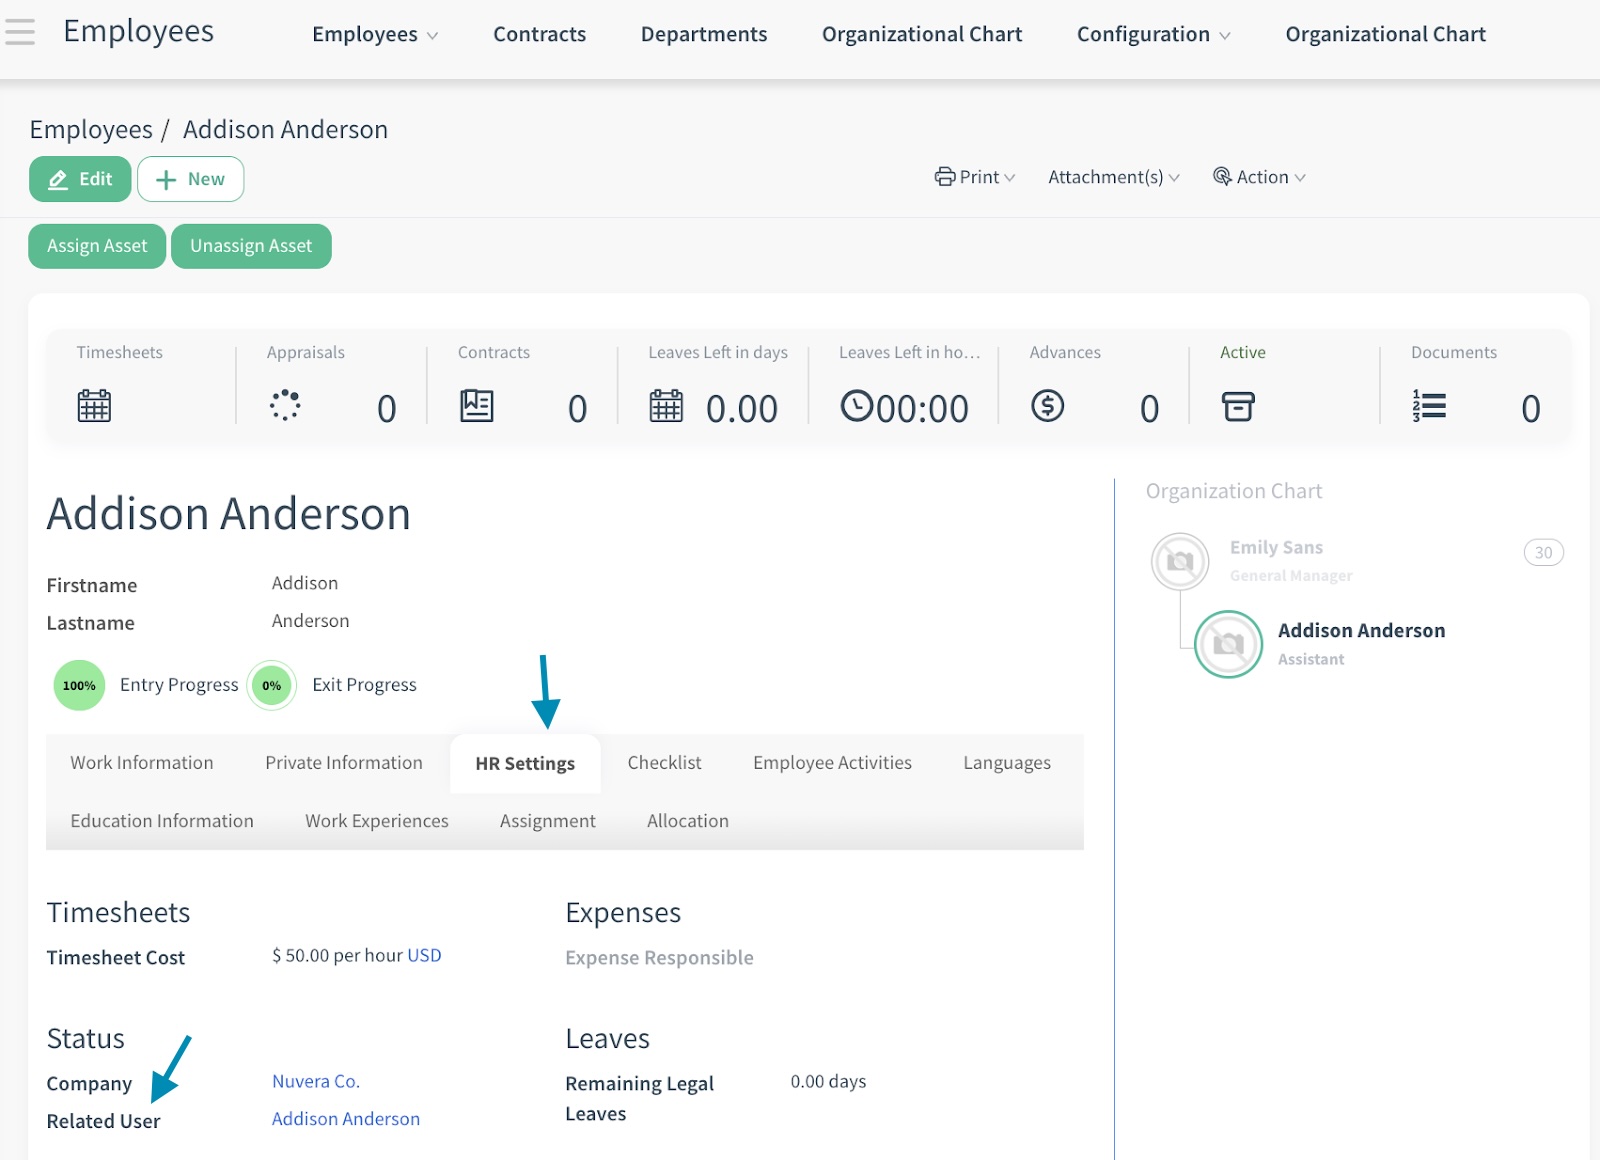
- In the HR Settings tab:
- Under 'Related User,' select an already created user name or Create and Edit a new one.
- Create and Edit: A user creation form opens. Complete:
- Name: Full name.
- Email: Same as work email.
- Save the user, then save the employee record.
- Create and Edit: A user creation form opens. Complete:
- Under 'Related User,' select an already created user name or Create and Edit a new one.
★ This method ensures the employee and user are linked, enabling features like timesheets, etc.
NOTE THAT: When you select Create and Edit option, a user creation form opens. Inside of this form, there will be already given access rights near to the Access Rights section. These accesses are coming from the 'Default User Template'. To access and edit this template please follow these steps:
- Settings > Users & Companies > Users
- Remove the default 'Internal Users' filter from the search bar by clicking the small 'x' icon.
- Write 'Default' in the search bar and click enter.
- Click 'Filters' under the search bar.
- Select 'Inactive Users' filter.
- Now, you will be able to view the Default User Template.

To edit this template, click on it and modify the access rights. From now on, every new user created through the Employees or Settings apps will automatically inherit this template. The access rights defined in this template will be applied to all newly created users. You can adjust these access rights later as needed.
Best Use Case: Setting basic access rights in this template saves time. For example, granting 'Employee' permissions in the access rights for the Employee app (e.g., Employees/Employee) ensures that when a new user is created, this access right is automatically applied. This way, every newly created user will automatically be included in the Employees/Employee group.
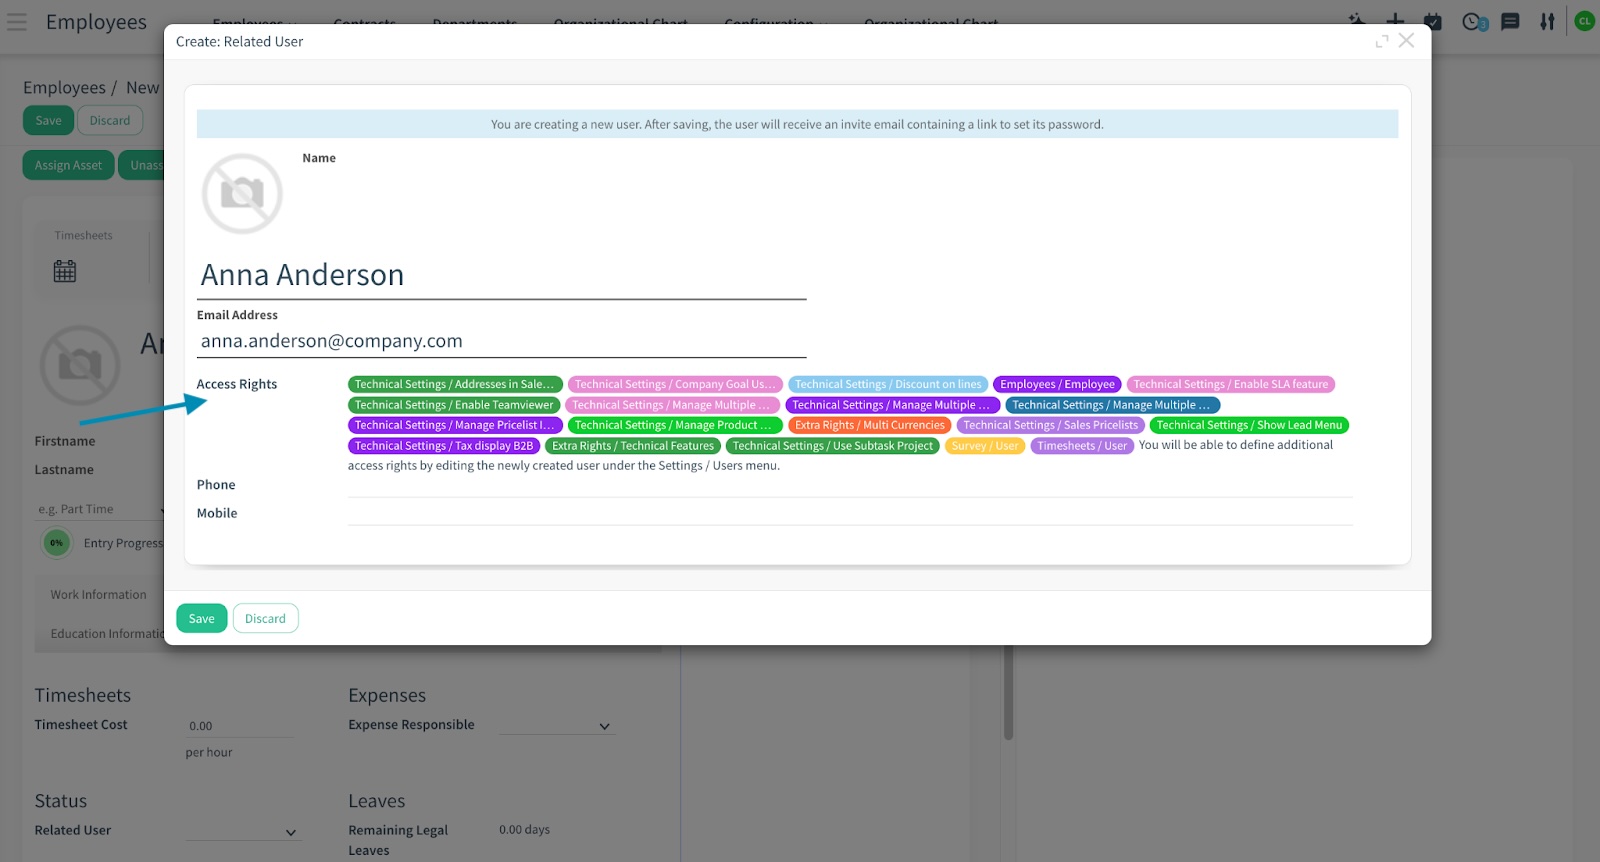
The newly created user/employee above (Anna Anderson), has access rights that are automatically coming from the Default User Template. This means the person creating the user does not need to manually assign these access rights individually.
3.2 Secondary Method: Via Settings App > Users & Companies > Users
- Open the Settings app.
- Navigate to Users & Companies > Users. (The new user opens with the 'Default User Template', you can edit the access rights of the new user from the access rights tab.)
- Click Create.
- Fill in:
- Name: Full name.
- Email: Work email.
- Access Rights tab: Assign groups.
- Save the user.
- Optionally, link to an employee record via Employees > Select Employee > HR Settings > Related User.
4. Portal User Creation
Portal users are external stakeholders (e.g., customers, vendors) with restricted access to specific features, such as viewing invoices or submitting forms. There are two methods to create portal users.
4.1 Method 1: Via Contacts App
- Open the Contacts app.
- Click Create to add a new contact or select an already created contact from your contacts.
- Fill in:
- Name: Select whether this contact is an individual or a company. Enter the name (if it is an individual e.g., 'Andrew Tyler' or a company e.g., 'Acme Corp').
- Email: Valid email for login.
- Save the contact.
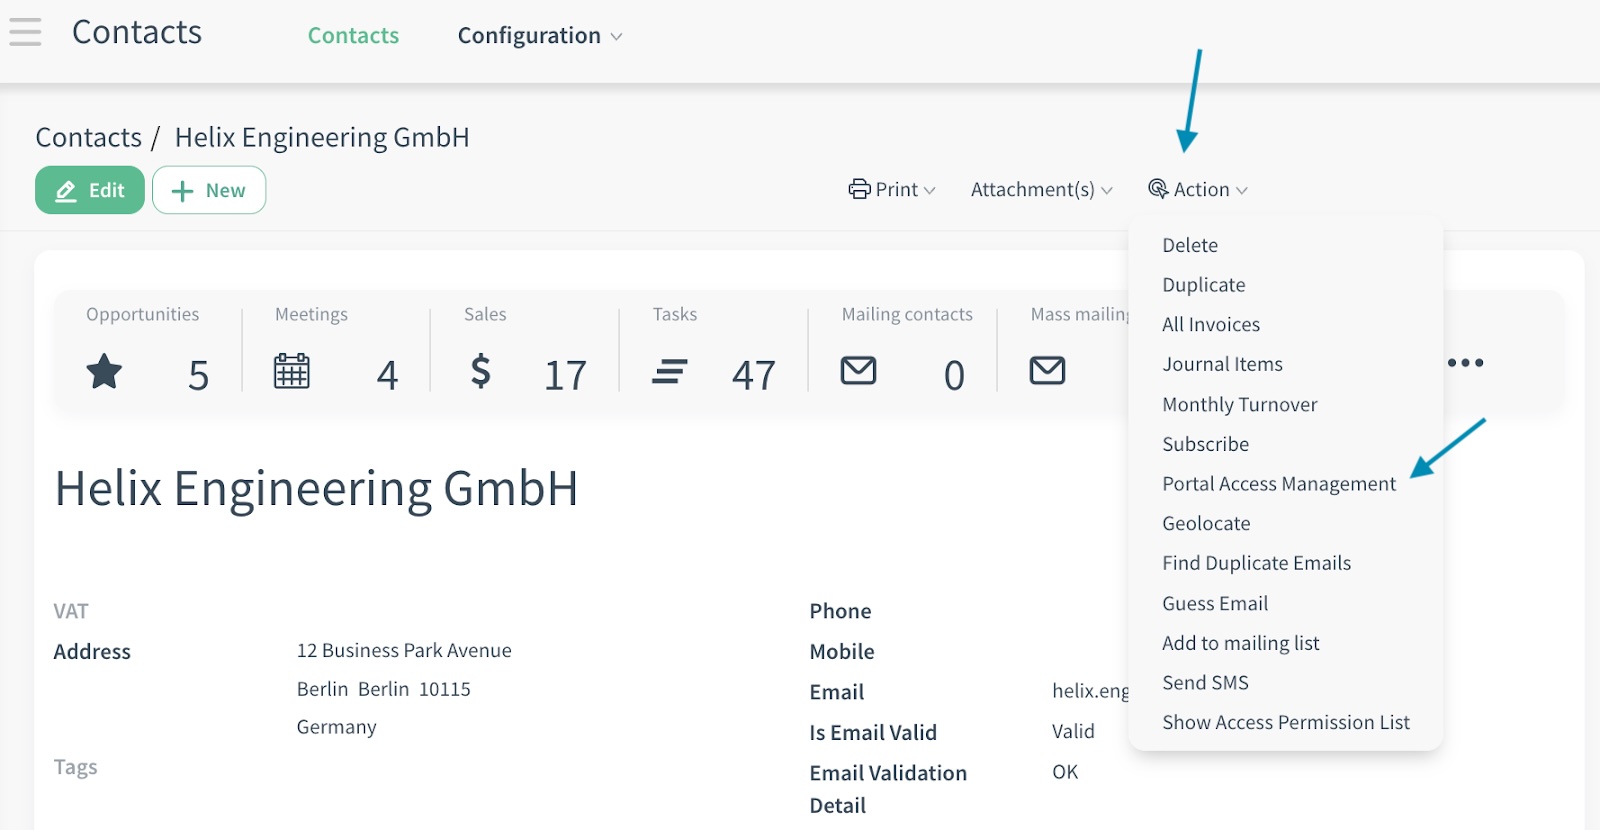
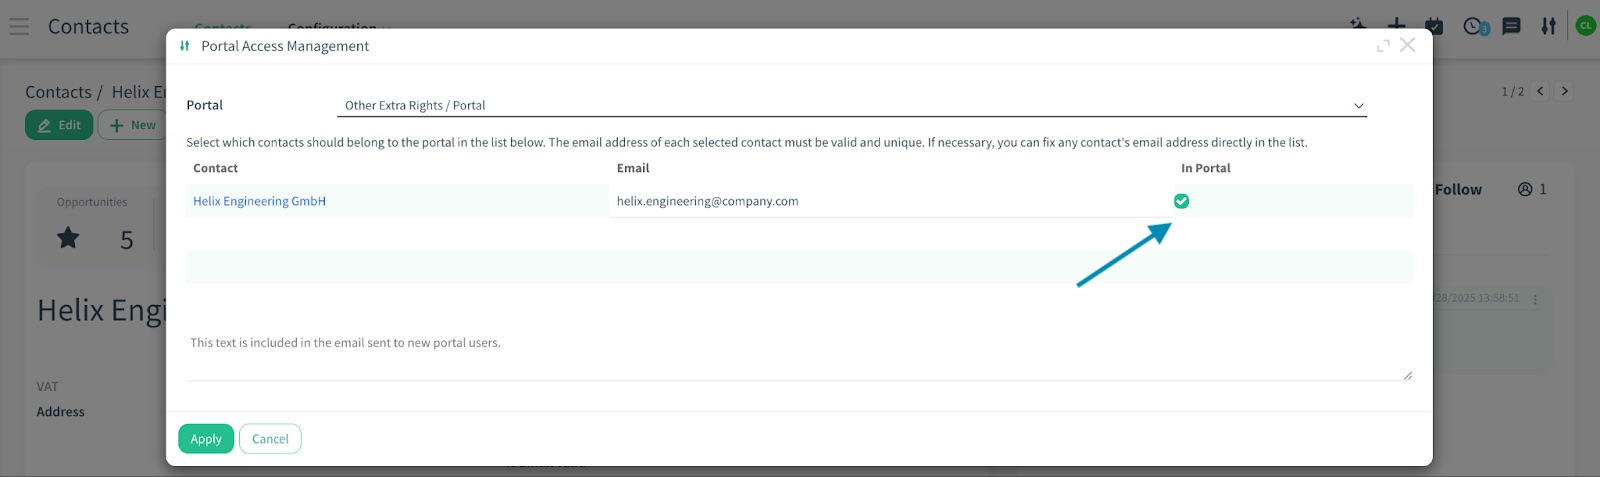
- From the contact's form view, click the Action dropdown > Portal Access Management.
- In the popup:
- Check the box for 'In Portal'.
- Click Apply.
- CloudOffix sends an invitation email with login instructions.
Best Use Case: Use for customers or vendors already in the Contacts database.
4.2 Method 2: Via Settings > Users
- Open Settings > Users & Companies > Users.
- Click Create.
- Fill in:
- Name: Contact's name.
- Email: Valid email.
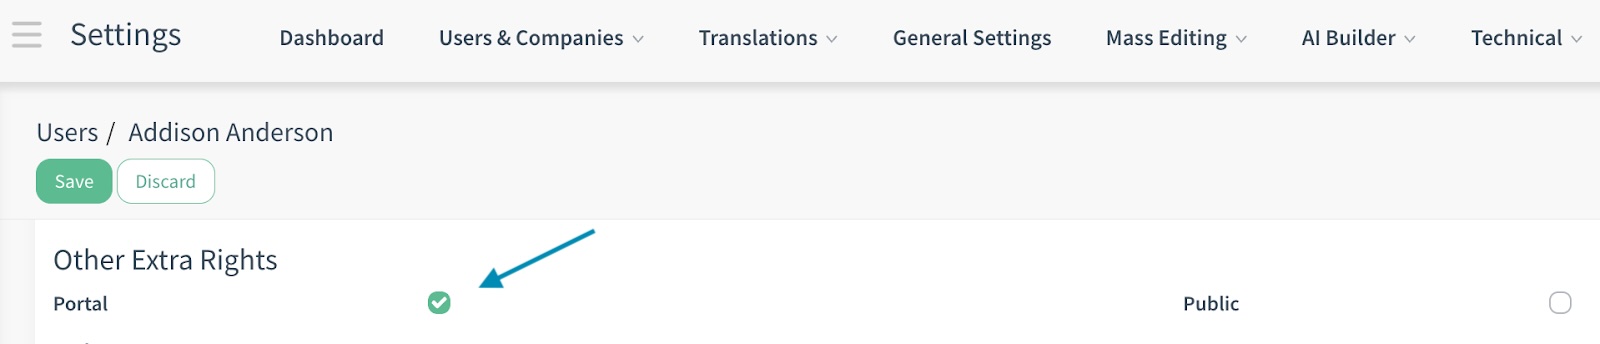
- In Access Rights, ensure only the check box for 'Portal' group is selected.
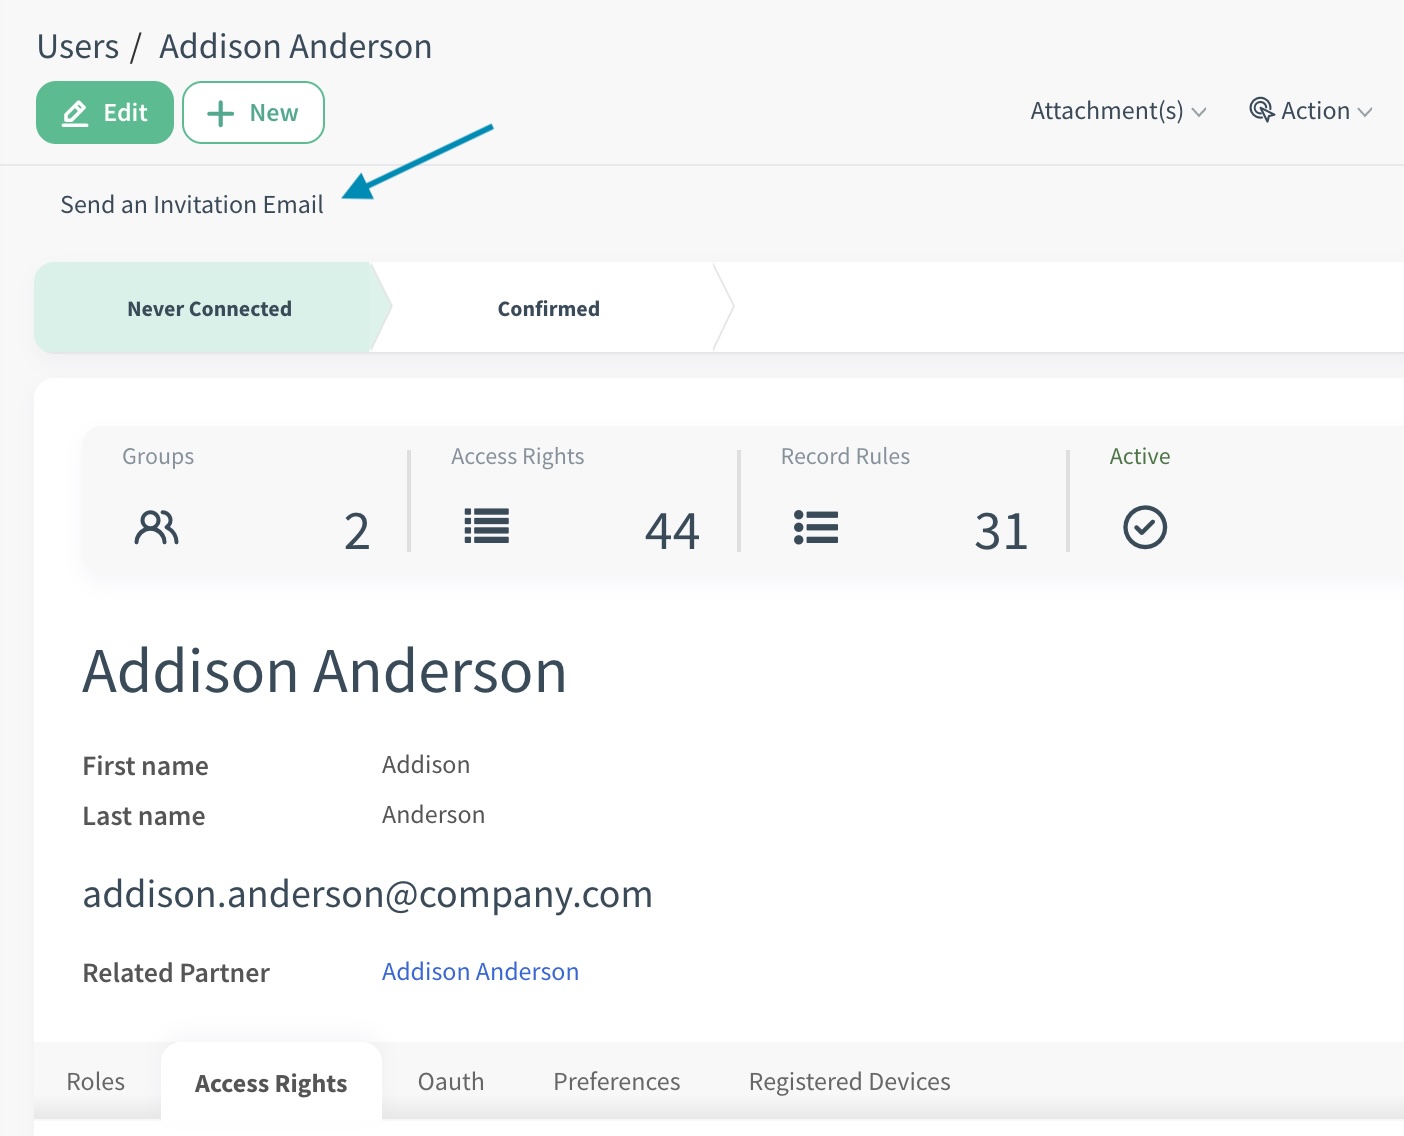
- Save and send an invitation email.
Best Use Case: Use for quick setup or when no contact record exists.
4.3 Configuring Portal Access
Configuring portal access involves setting up which records (e.g., quotations, invoices) portal users can view or interact with via the portal interface.
Granting portal access does not automatically provide visibility to all portal objects, including both database-created and custom objects. For each portal object, access must first be explicitly granted to the portal group (Other: Extra Rights / Portal) through Access Control List (ACL). However, certain objects, (e.g., My Opportunities and My Leads), are provided directly from the database and will be visible to portal users when these database-provided objects are utilized.
Backend users, by default, have access to view records associated with their account on the portal interface, provided those records exist in the backend system. Specifically, users with access to CRM (Opportunity) in the backend will automatically see these records reflected in the portal. Below is the complete list of objects that are directly from the database and visible to portal users:
- My Opportunities: Backend users with access to CRM opportunities can view their assigned opportunities directly in the portal under the 'My Opportunities' section.
- My Leads: Leads are visible in the portal under 'My Leads' when the Reseller app is installed through Apps. To download this app assistance is needed. For example, if a third-party or distributor is involved, request the consultant to configure the Reseller setup to ensure leads appear in the portal view.
- Quotations – Sales Orders – Purchase Orders – Invoices: These records are visible to customers in the portal.
- My Appraisals: Any user associated with an appraisal can view and complete their assigned evaluations in the portal by logging in to their accounts.
- My Employee Profile: This supports the self-service HR vision. Upon joining the company, employees complete a one-time customized form to provide specific personal details, such as address, contact information, or other relevant data. This streamlined process eliminates repetitive manual updates. Employees can access the portal at any time to update their information, such as an address change, without needing administrator assistance. Customized forms can be tailored to collect specific employee data, and all employees can securely fill out and submit these forms through the portal, significantly reducing manual data entry for HR administrators.
- Project: To allow customers to track projects in the portal.
- My Tickets: If a portal user submits a ticket through the website or a public user submits a ticket than later creates an account with the same email address the system recognizes the user and displays their tickets in the portal under 'My Tickets.' This functionality works regardless of whether the user signs up before or after creating a ticket.
- My Assets: When the Asset or IT Service Management application is installed, employees can view devices assigned to them in the portal under 'My Assets.' They can also submit requests related to these assets.
- All Tickets: Displays all tickets associated with the company.
- All Assets: Shows all assets assigned to the company.
- Employees: Lists all employees within the company.
Note: To make ‘My Employee’ visible in the portal view, follow either of these paths:
Employees app > Configurations > Scroll down and check the box for ‘HR Employee Portal’ > Save the changes
Settings app > General Settings > Employees > Scroll down and check the box for ‘HR Employee Portal’ > Save the changes
If the IT Service Management MSP module is installed, the following features are available in the portal:
These features are visible only to users with MSP Manager (Company Manager) permissions, allowing them to manage and monitor tickets, assets, and employees.
Custom Objects and Portal Access: To expose additional backend objects or custom objects in the portal, refer to the relevant documentation: Portal Builder - Custom Objects and Portal Access