
Configuring Portal Access for Records
Configuring Portal Access for Records
This document outlines the process for configuring portal access to specific records in CloudOffix, enabling portal users to view designated data through a customized portal interface. By leveraging CloudOffix's App Builder, administrators can create tailored portal designs, adjust field properties, and control visibility settings to ensure seamless and secure access for portal users. The steps below detail how to navigate the form view, create a portal design, customize its layout, and enable web access, with options to display records in the ‘My Account' on portal side and on an external website by embedding the code.
Step-by-Step Configuration Guide
-
Navigate to the Related Form View:
- Open the relevant app for the records you want portal users to access (e.g., Contacts (My Contacts)).
- Select or create a record (e.g., a quotation). Open its form view by clicking on it.
-
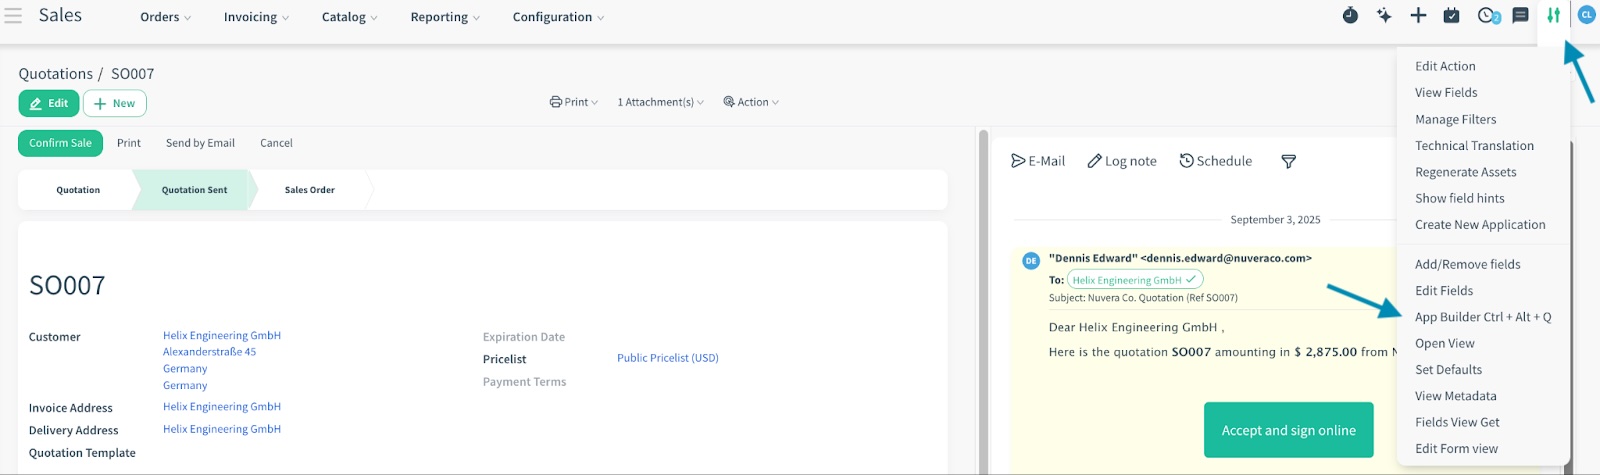
Open the App Builder:
- On the top right of the screen click on the developer tools icon (up and down arrow).
The developer tools icon is only visible to users who are in the Administration/Settings group.
- From the list click on ‘App Builder’.
- On the top right of the screen click on the developer tools icon (up and down arrow).
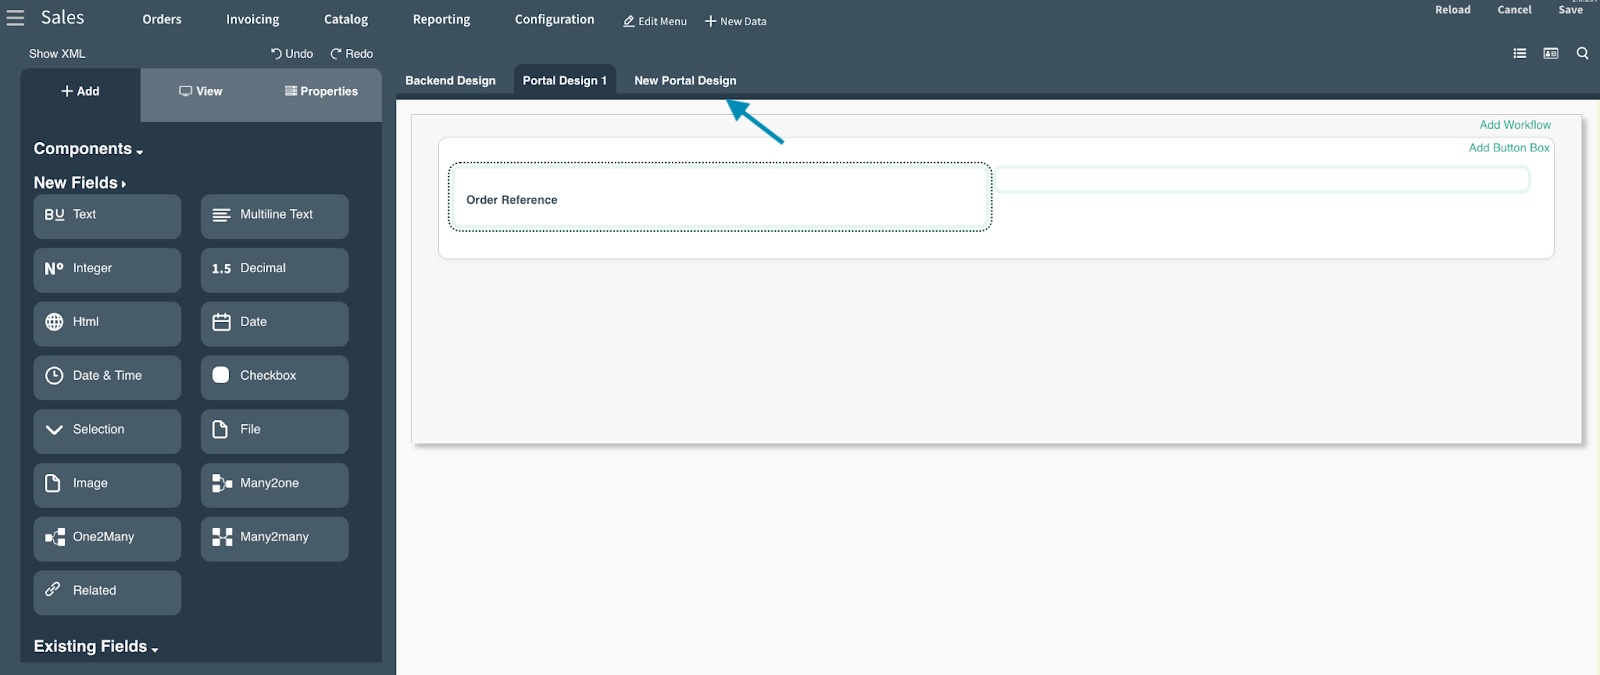
- Click on 'New Portal Design' and a new portal design will be created (e.g., Portal Design 1).
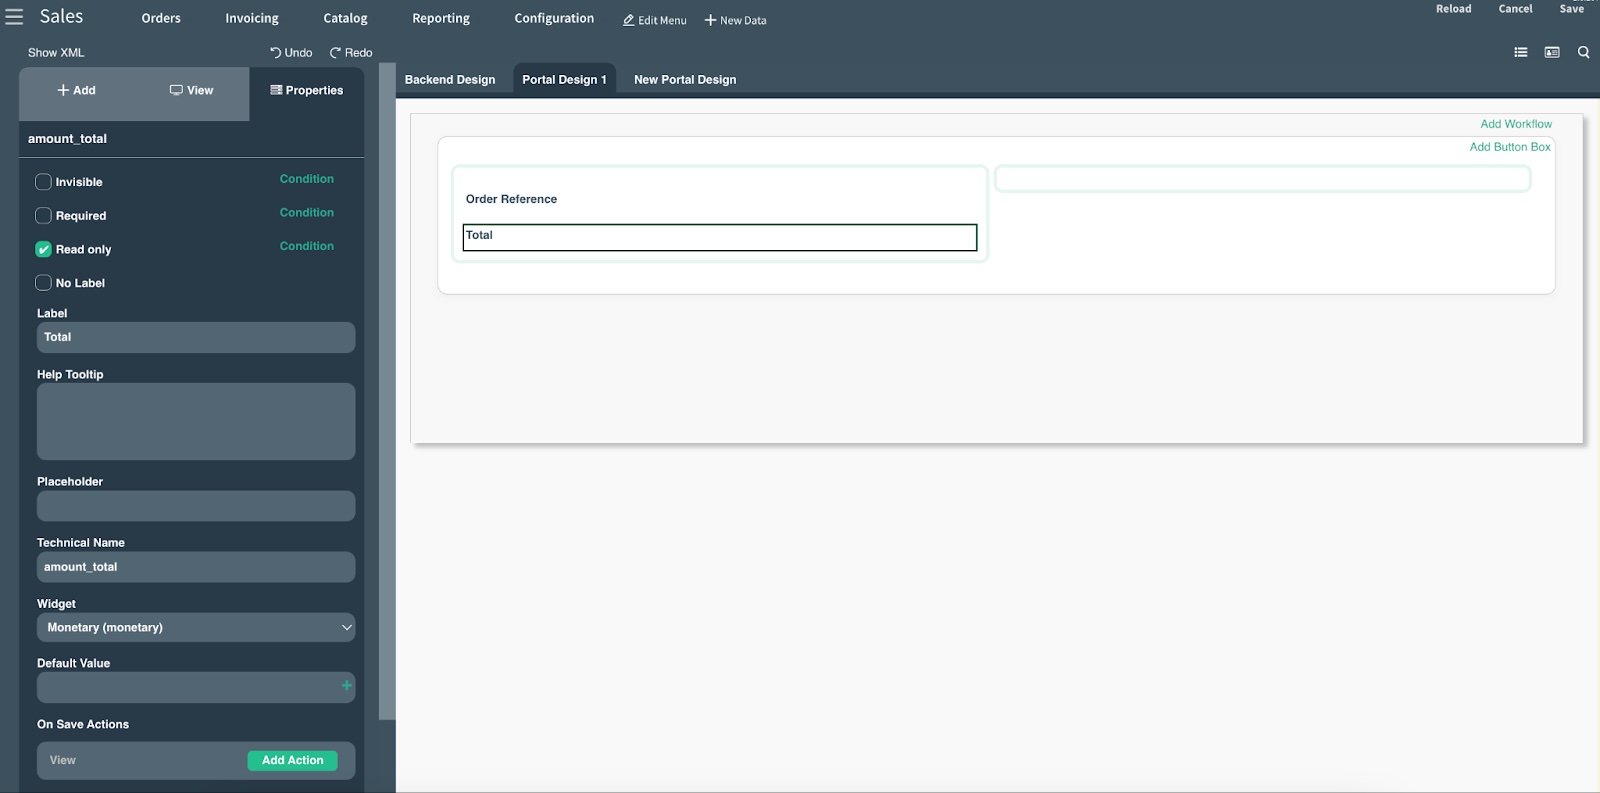
- By using drag and drop from the ‘Add' tab customize the view and edit the properties (e.g., read only, label, etc.) from the ‘Properties' tab for the new field.
- Open the 'View' tab.
- Check the box for 'Enable web access'.
- This way, when you click on show code and copy the code, you can embed it to a website.
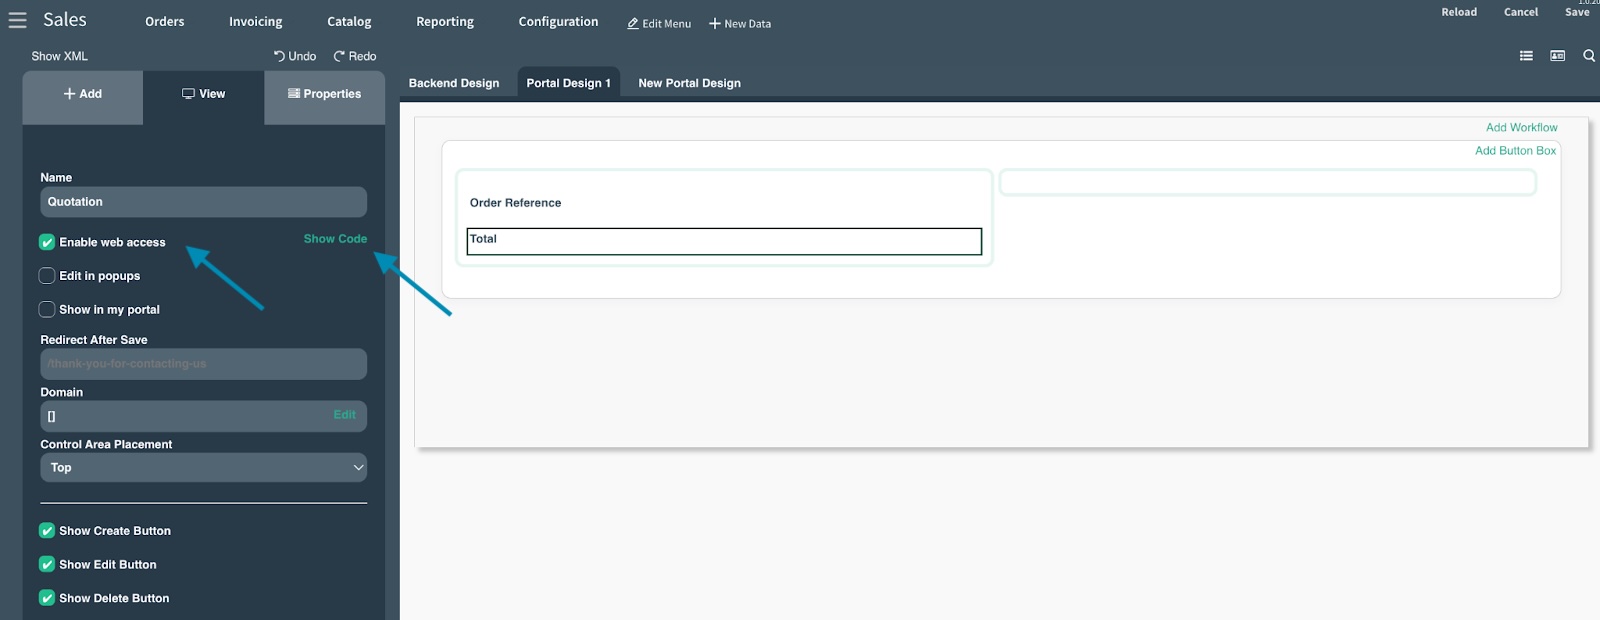
- Then, check the box for ‘Show in my portal’.
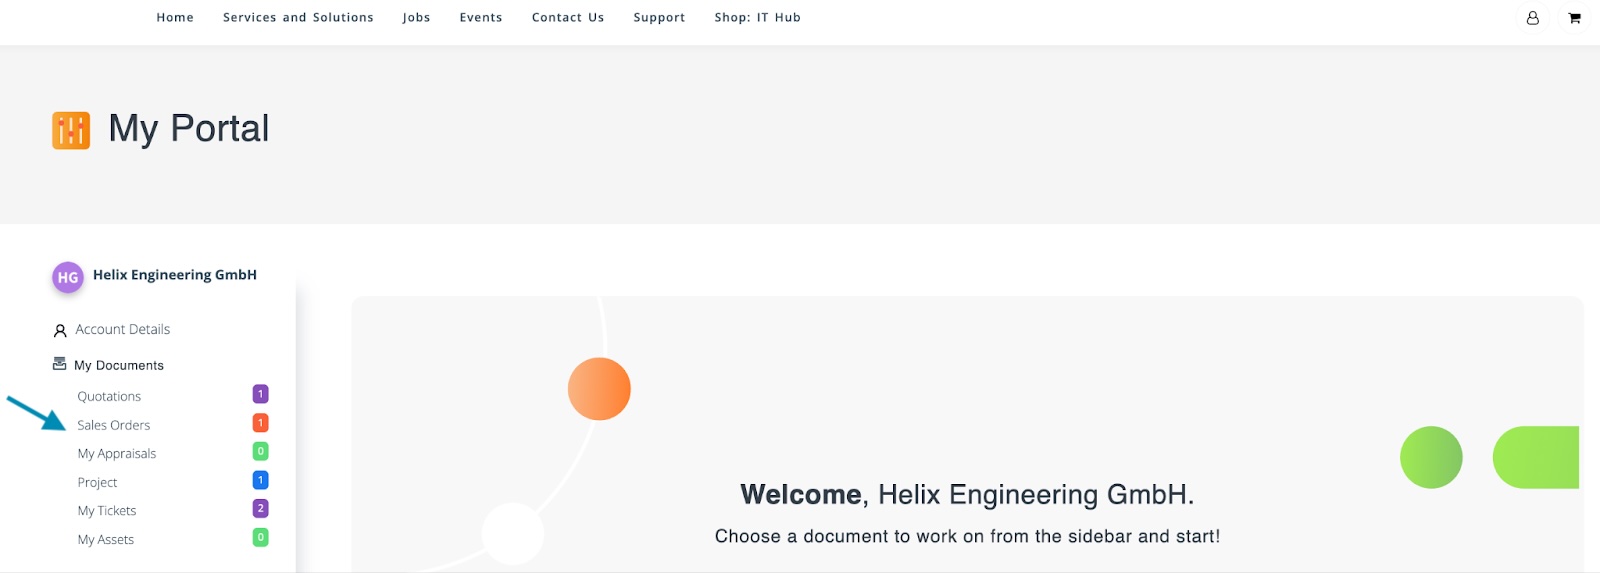
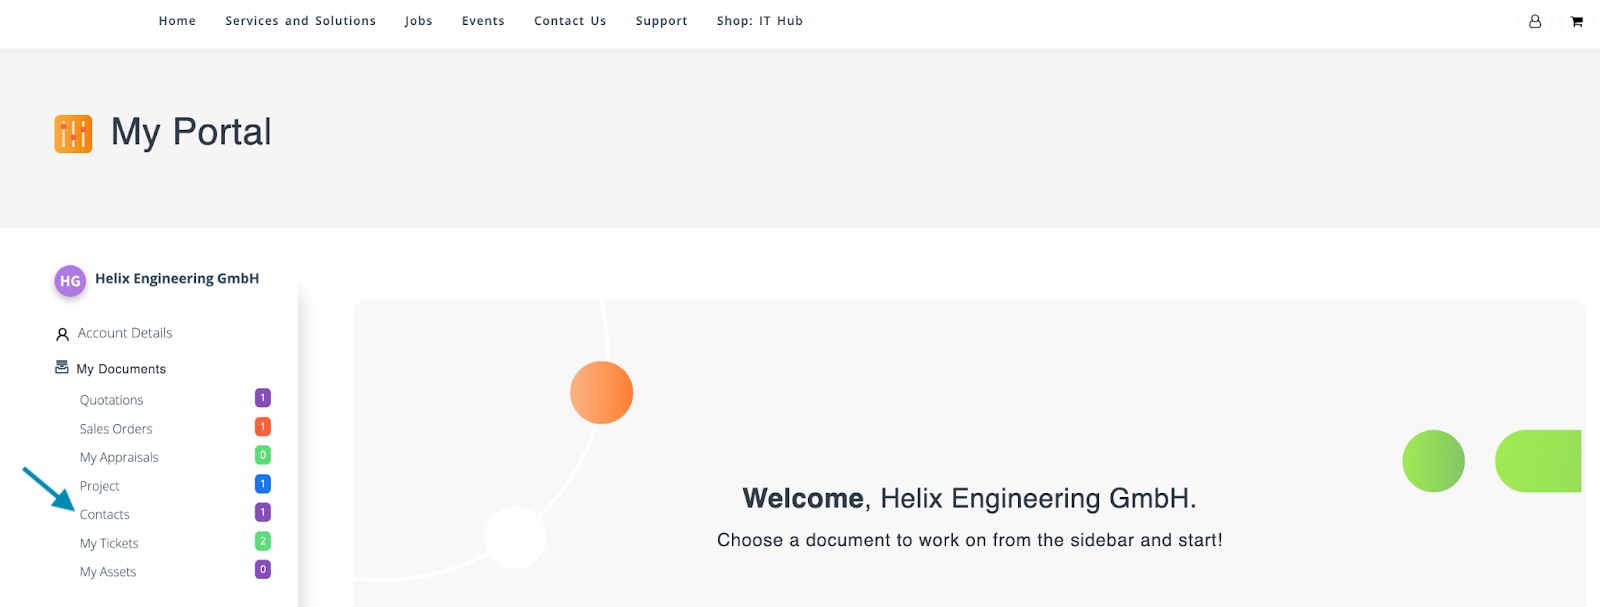
- 'Show in my portal' checkbox is not a must. If you wish to show it on the sidebar in the portal, you can check this box.
- Click 'Save' to save the portal design.
★To further restrict the access, please create record rules.
Example:
- A new portal design has been created for Contacts and only the checkbox for 'Enable web access' is checked. The item will be accessible via link but not listed on the portal sidebar.
- A new portal design has been created for Contacts and both the checkboxes for 'Enable web access' and 'Show in my portal' are checked. This way, it is listed on the sidebar in the portal.
Configuring Access Control Rights
A portal user may be able to view ‘Contacts' if the model has access rights assigned to the 'Other Extra Rights/Portal' group in the Access Controls List (see the screenshot below for reference).
If the portal user cannot see it, specific access rights must be granted for the relevant object to the correct group.

To configure this:
- Navigate to Settings > Technical > Access Controls List.
- Search for the object name. Select ‘Search Object for’ after entering the name.
- If the group (e.g., Other Extra Rights/Portal) does not appear in the list for the object (e.g., Contact), click ‘New’ to create one.
- Assign a clear, distinct name for future reference.
- Choose the relevant object and group. For portal users, the group is 'Other Extra Rights/Portal'.
- Adjust the access rights (Read, Write, etc.) as needed.