How to Collaborate and Navigate in Chatter
CloudOffix - How to Collaborate and Navigate in ChatterCollaborate Without Leaving the Current Screen
The chatter is located in many apps across the CloudOffix system. Since we can’t use all apps to demonstrate the chatter feature, we have chosen the Sales App, located in the Sales Cloud Drawer.
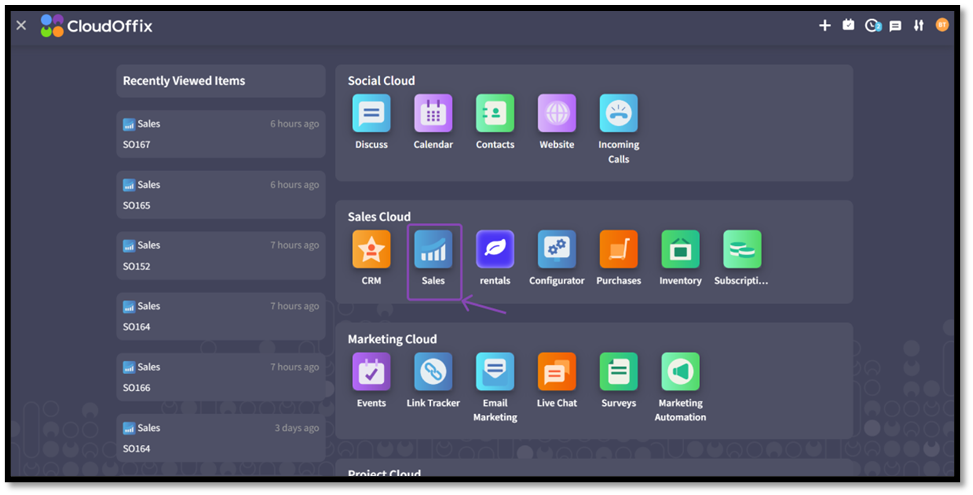
Fig. 1: CloudOffix App Drawer page, Click the Sales App to begin.
Click ‘New’ to begin creating a quotation as per usual.
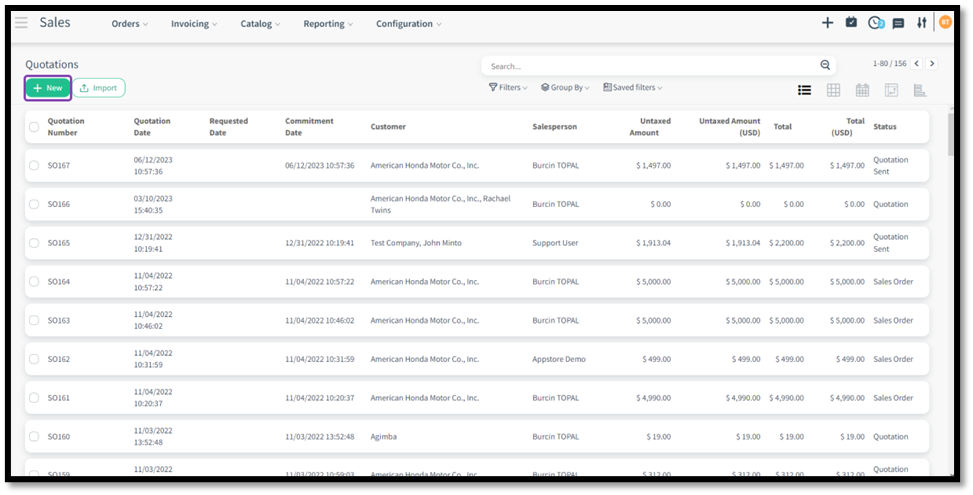
Fig. 2: ‘New’ button
Complete the details of the quotation as usual, including the customer and add items for the quotation.
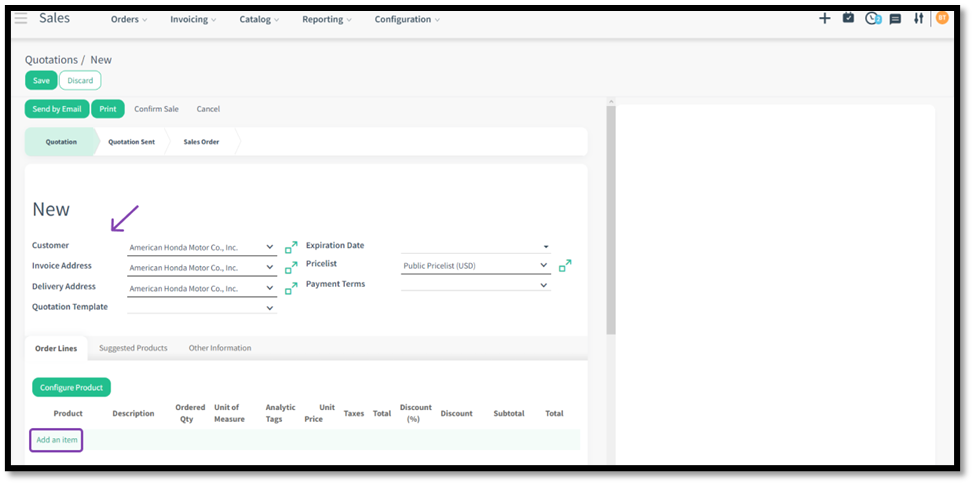
Fig. 3: Enter the Quotation Details
Save the completed quotation.
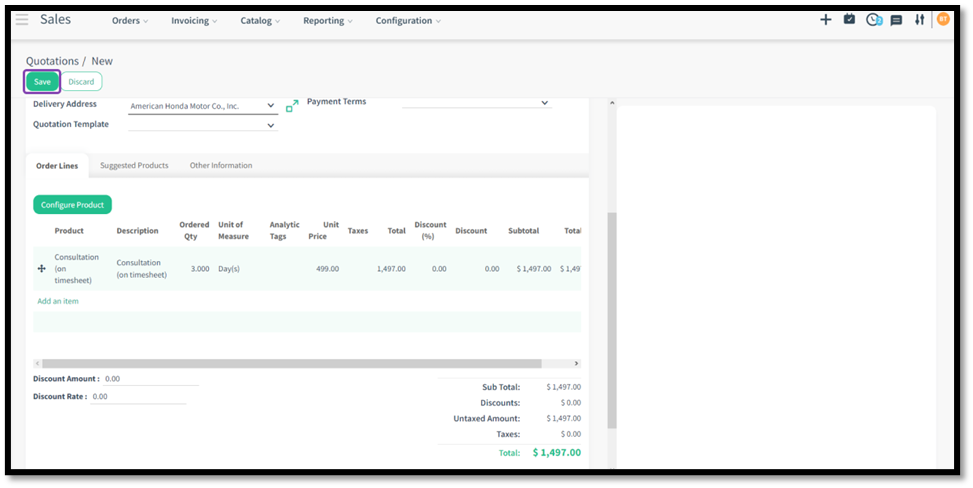
Fig. 4: Save the quotation
To the right side of the screen, the details of the newly created quotation will appear. This section is called the ‘Chatter’ and displays every detail about the quotation (in this case), including all collaborations.

Fig. 5: Details appear in the Chatter
Send the quotation to the customer by clicking the ‘Send by Email’ button on the top left.
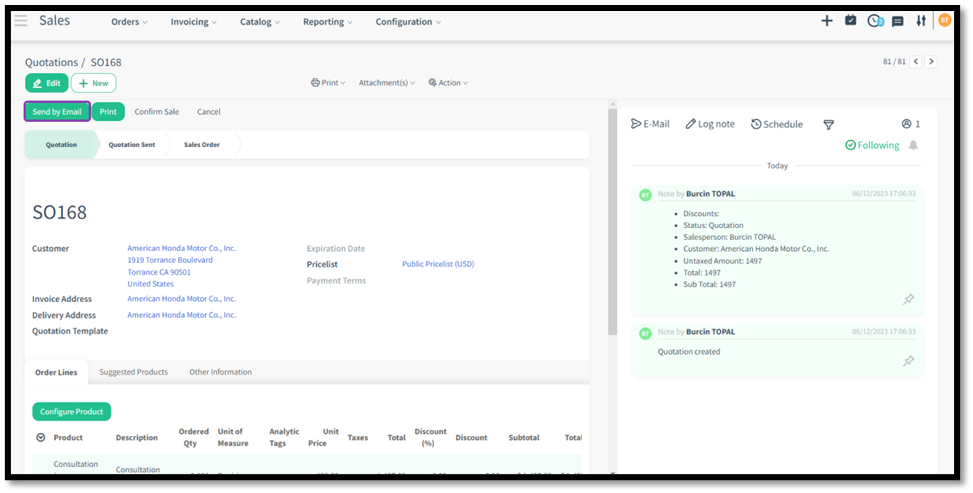
Fig. 6: Send the quotation
The Email screen appears with all details and with the ‘accept and sign online’ button, and the quotation attached Send the email by clicking the ‘Send’ button.
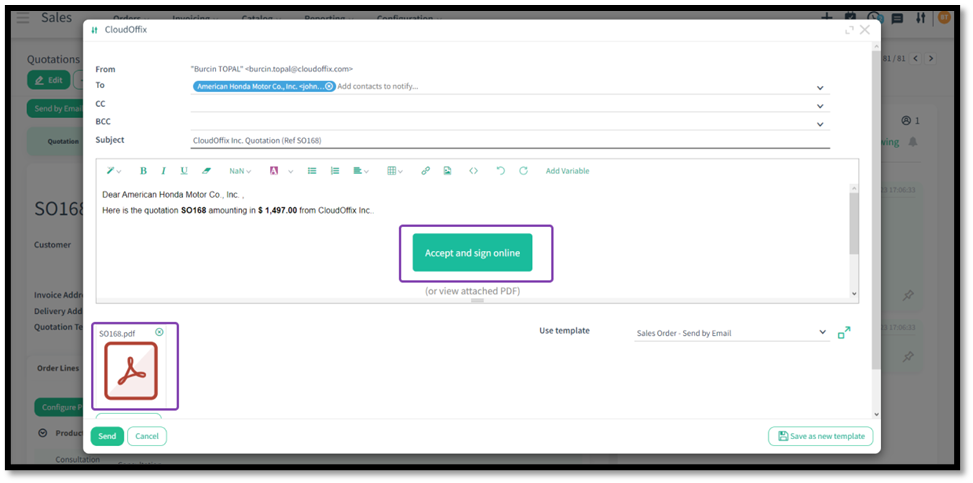
Fig. 7: Email screen
Once the email has been sent, all the details are now visible in the chatter, including the email body with the button, and the attachment.
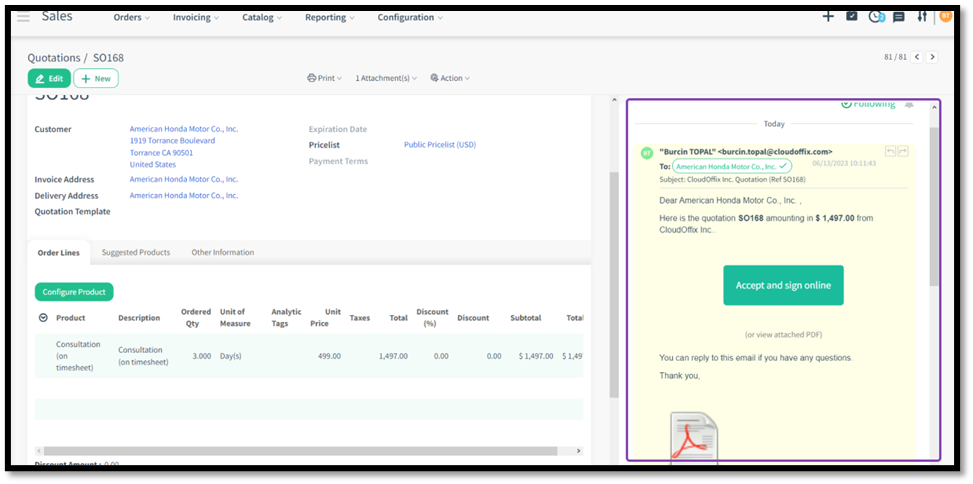
Fig. 8: Details of the email are seen on the chatter
The top of the chatter has an activity bar from where activities such as sending emails, log notes, scheduling activities, and filtering can be carried out.
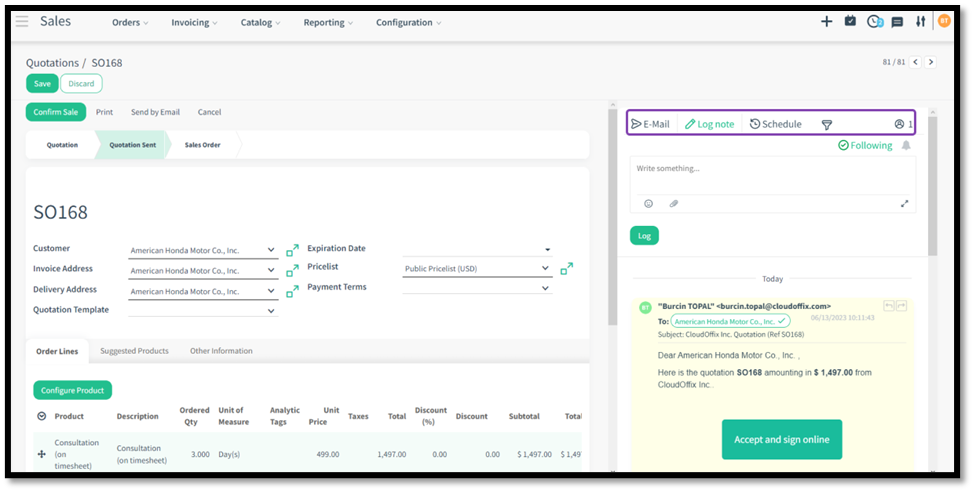
Fig. 9: Activity Bar
Begin with Log note. Use the ‘@’ character to tag a colleague to send a note within the quotation chatter. In the note, use emojis and even attach documents.
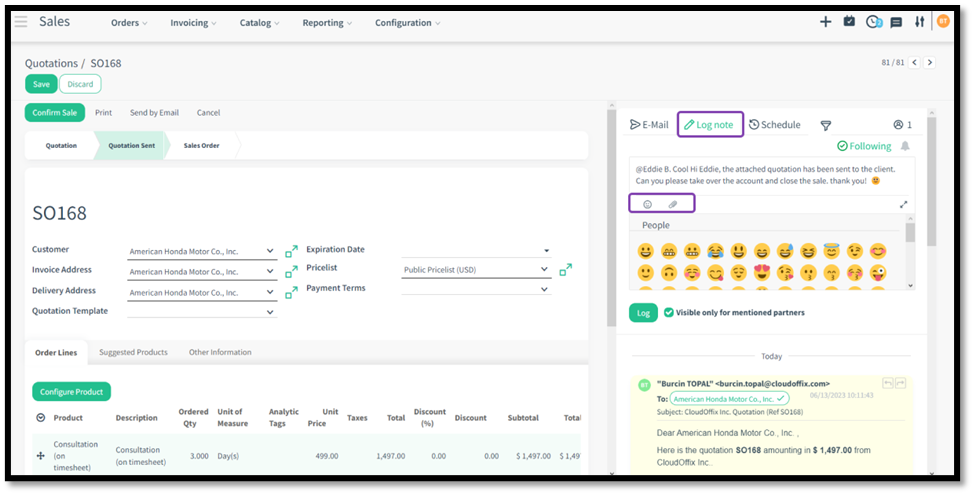
Fig. 10: Log Note
Click the checkbox titled ‘Visible only for mentioned partners’ for the note to be seen ONLY by the mentioned people.
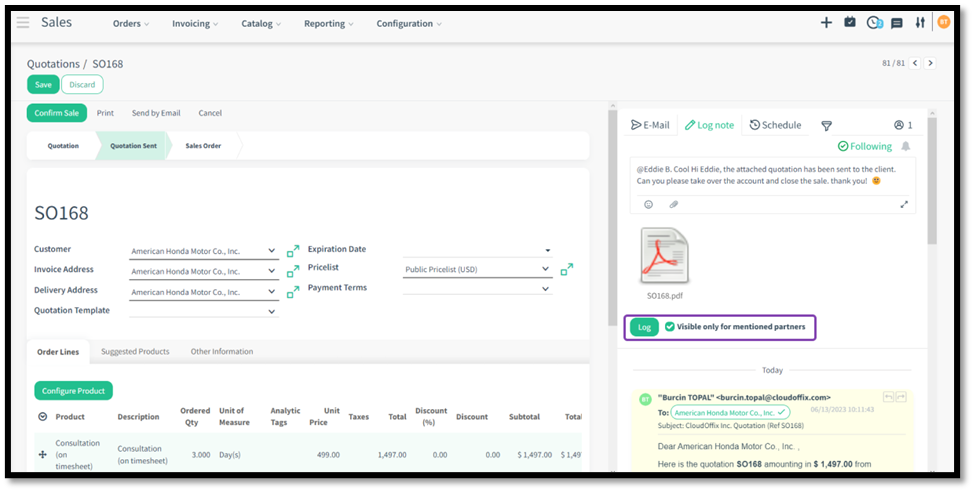
Fig. 11: Private notes within the chatter
The log note is now visible only for the creator and the intended people. A private note is indicated by the ‘Private’ note on the log note. Click ‘Schedule’ to create and schedule an activity.
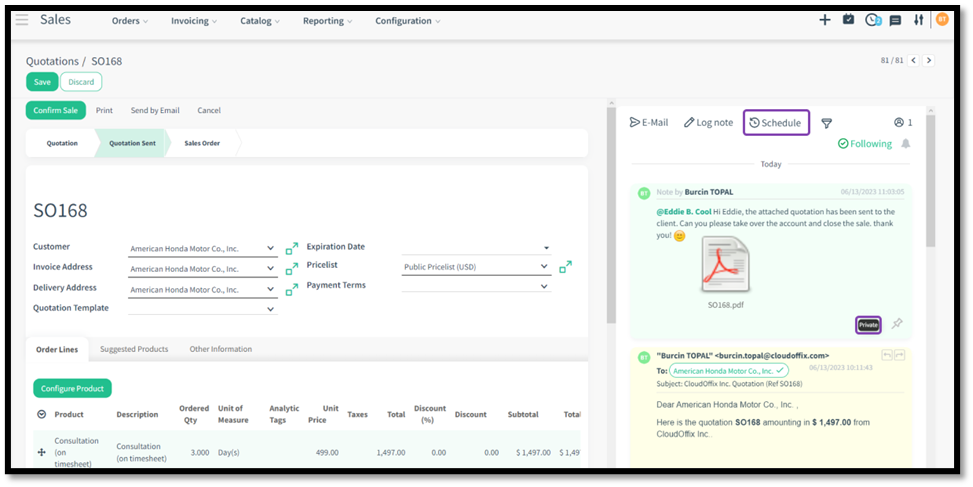
Fig. 12: Privacy indicator
Select the type of activity to be scheduled from the drop down list menu.
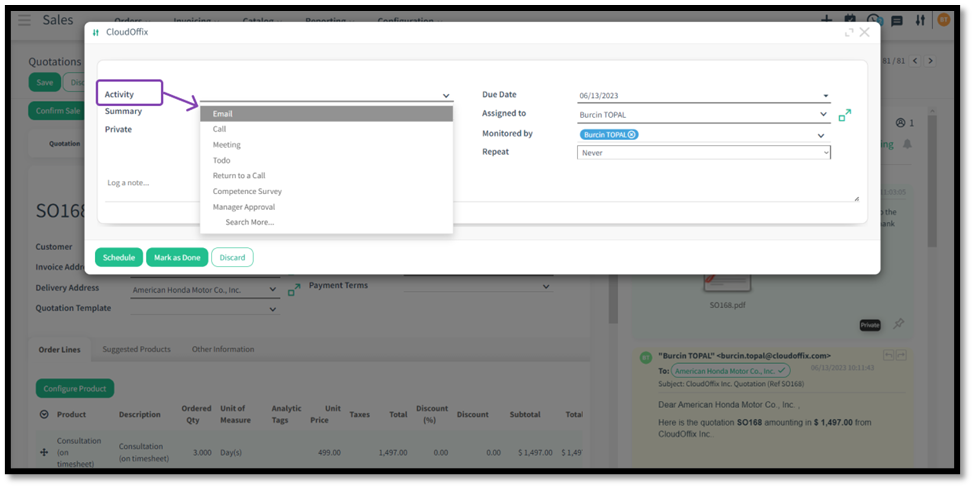
Fig. 13: Log Note
Let’s select call and assign it to a colleague.
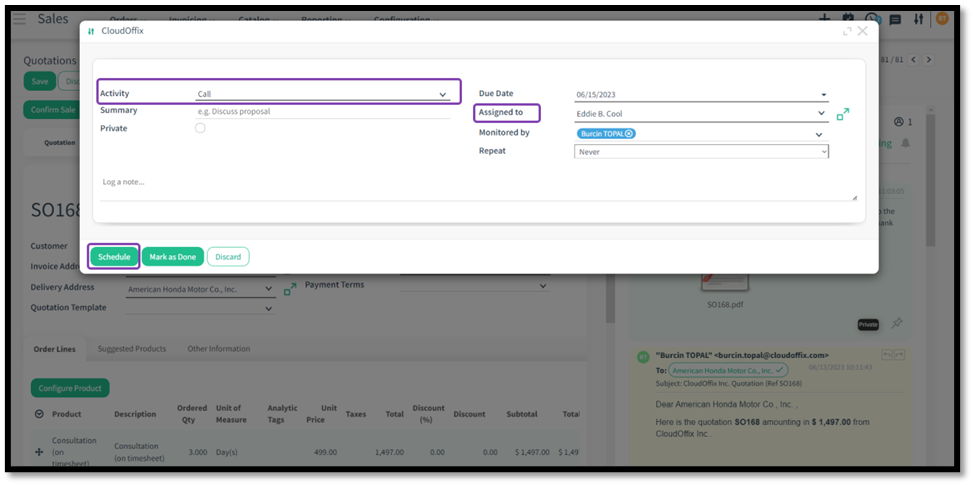
Fig. 14: Schedule a Call
In the same way, schedule a Meeting. Click Schedule a Meeting button at the bottom of the screen.
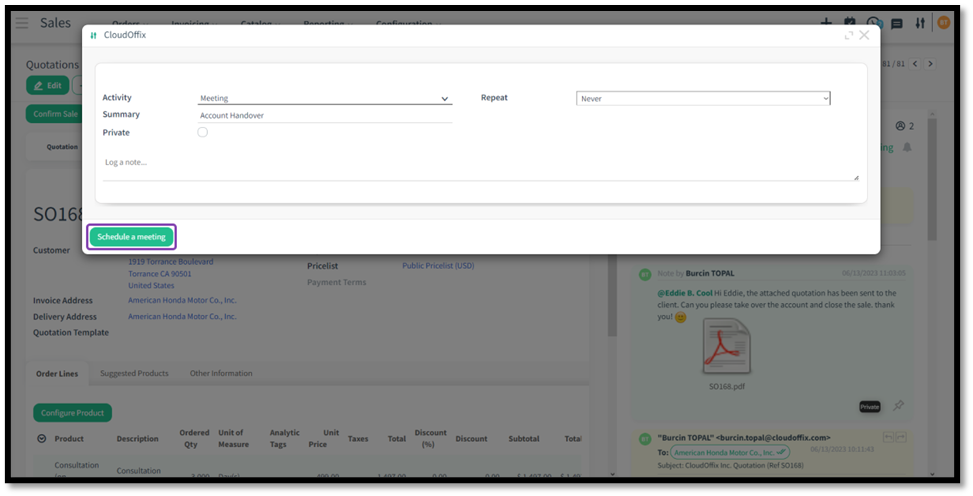
Fig. 15: Schedule a Meeting
The calendar opens up. Select the meeting date and time by dragging the mouse over the desired time slot.
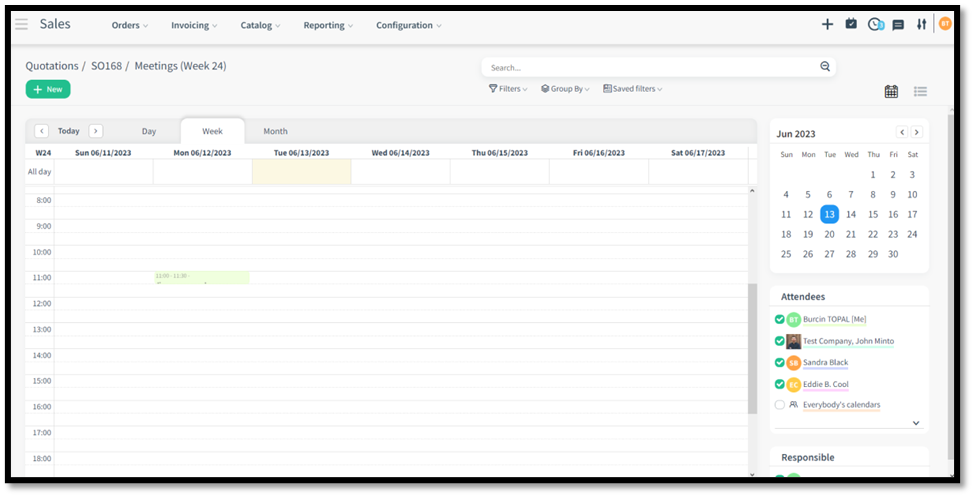
Fig. 16: Calendar Screen
Fill in the meeting details in the meeting pop up screen and click ‘Save’
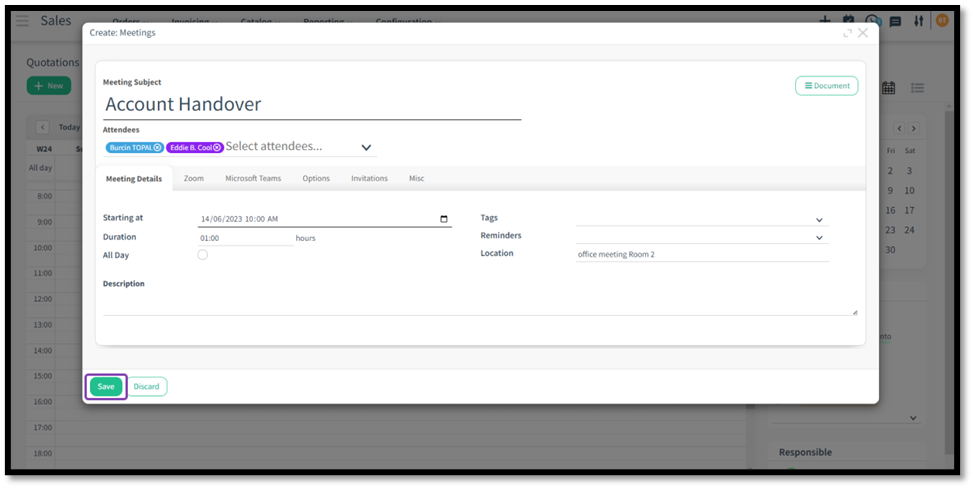
Fig. 17: Meeting Details
Use the breadcrumbs located on the top of the screen to return to the quotation.

Fig. 18: Breadcrumbs
All scheduled activities are visible of the chatter. This enables any new user to be able to see the history and understand the flow.
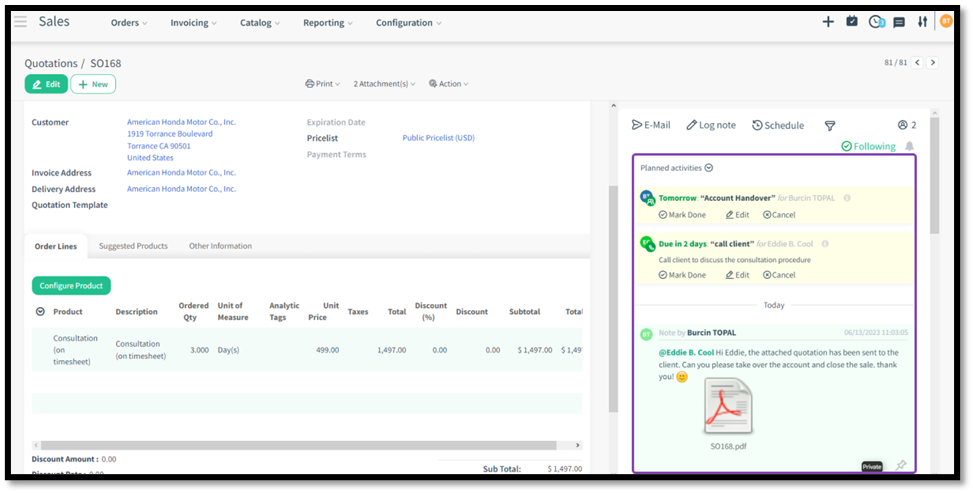
Fig. 19: Chatter flow of information
The profile picture on the right of the screen shows the number of followers for this quotation. The followers will be notified of changes made here. Followers can also be channels. For example, we could add the sales channel responsible for this account.
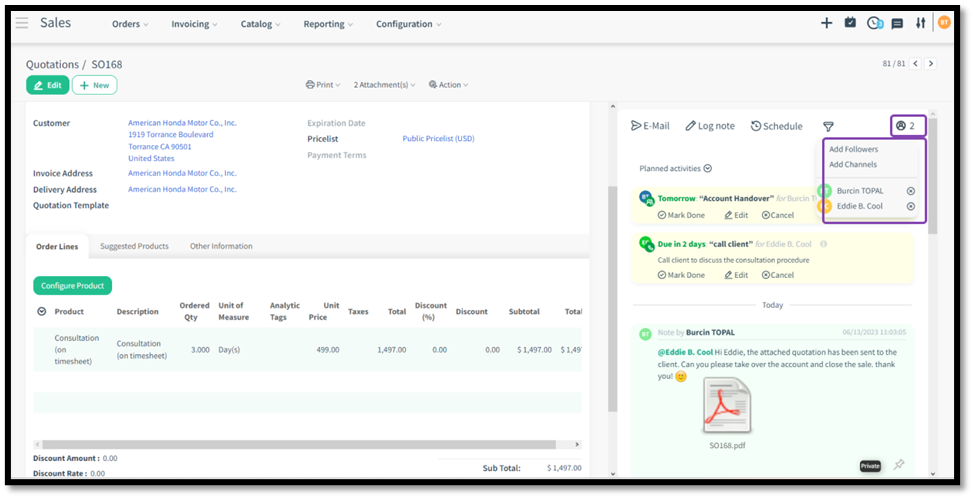
Fig. 20: Followers
The filters to sift through and find the desired information.
Subtypes that are inactivated in filtering are turned off for this record and will not be shown again until they are reactivated (that is, if the page is refreshed, the chatter will not be restored), so it is filtered based on the record. If a word is to be searched in the chatter, it only searches in enabled subtypes.
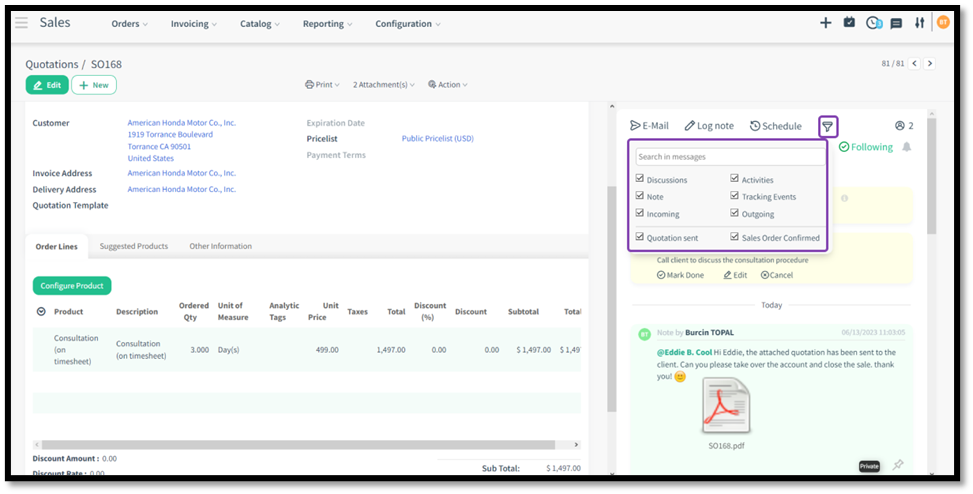
Fig. 21: Filters
Congratulations! You have just learned how to Collaborate and Navigate in the Chatter!