
Semantic Index User Guide
Semantic Index User Guide
The Semantic module transforms your CloudOffix database into an intelligent Knowledge Base. Unlike standard keyword search, this module allows you to “Search by Meaning”.
Why does this matter?
Standard Search (Keyword based): If you search for “Printer error”, the system looks for the exact word “Printer”. If the ticket description only says “Device is out of paper”, no results are found because the word “Printer” is missing.
Semantic Search (Meaning based): The AI understands that a “Device out of paper” is a printer issue. Even if the exact keyword isn’t there, it understands the intent and finds the record.
This capability allows you to:
Unified Search: Query across CloudOffix records (CRM, Helpdesk) and External Documents (M-Files, File Servers) simultaneously.
Intelligent Understanding: The system automatically understands your data structure without complex manual prompts.
Multilingual Support: As it uses advanced AI models, you can search in English for documents written in Turkish, German, or other supported languages.
1. Permissions & Security
Before starting, ensure you have the correct access rights.
| Feature | Required Group | Description |
|---|---|---|
| Configuration | Administration / Settings | Required to create Metadata Models, configure Fields, and set up External Data Sources (M-Files). |
| Search Usage | Internal User | Any standard user can perform semantic searches. |
| View Logs | Administration / Settings | AI Logs (ai.log) are technically visible to admins. |
2. Configuration (Metadata Configuration)
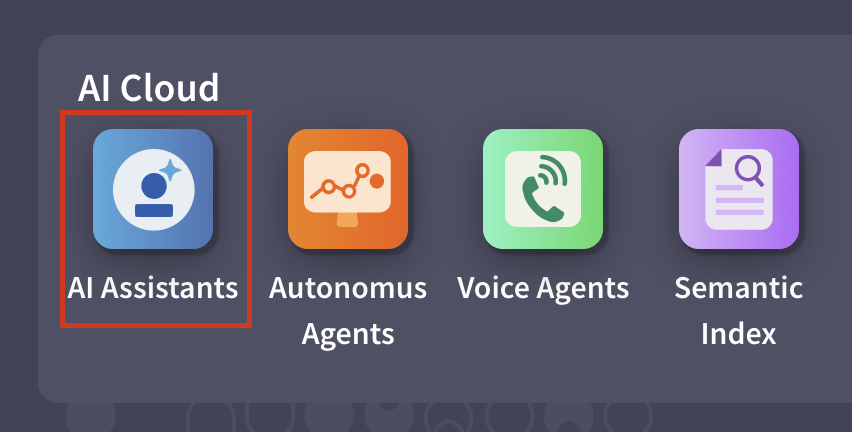
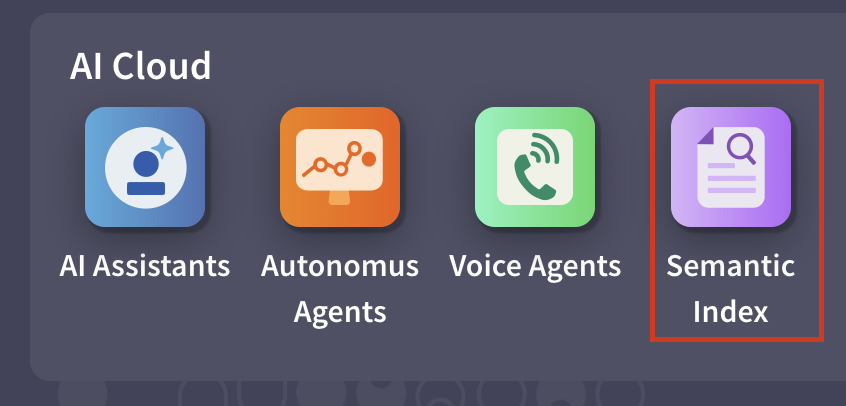
Navigate to the AI Assistants app under AI
Cloud (only users who have Administration / Settings
access rights can view and access this cloud), then
Configuration > AI Metadata to teach the AI about
your internal data.

2.1 Basic Model Settings
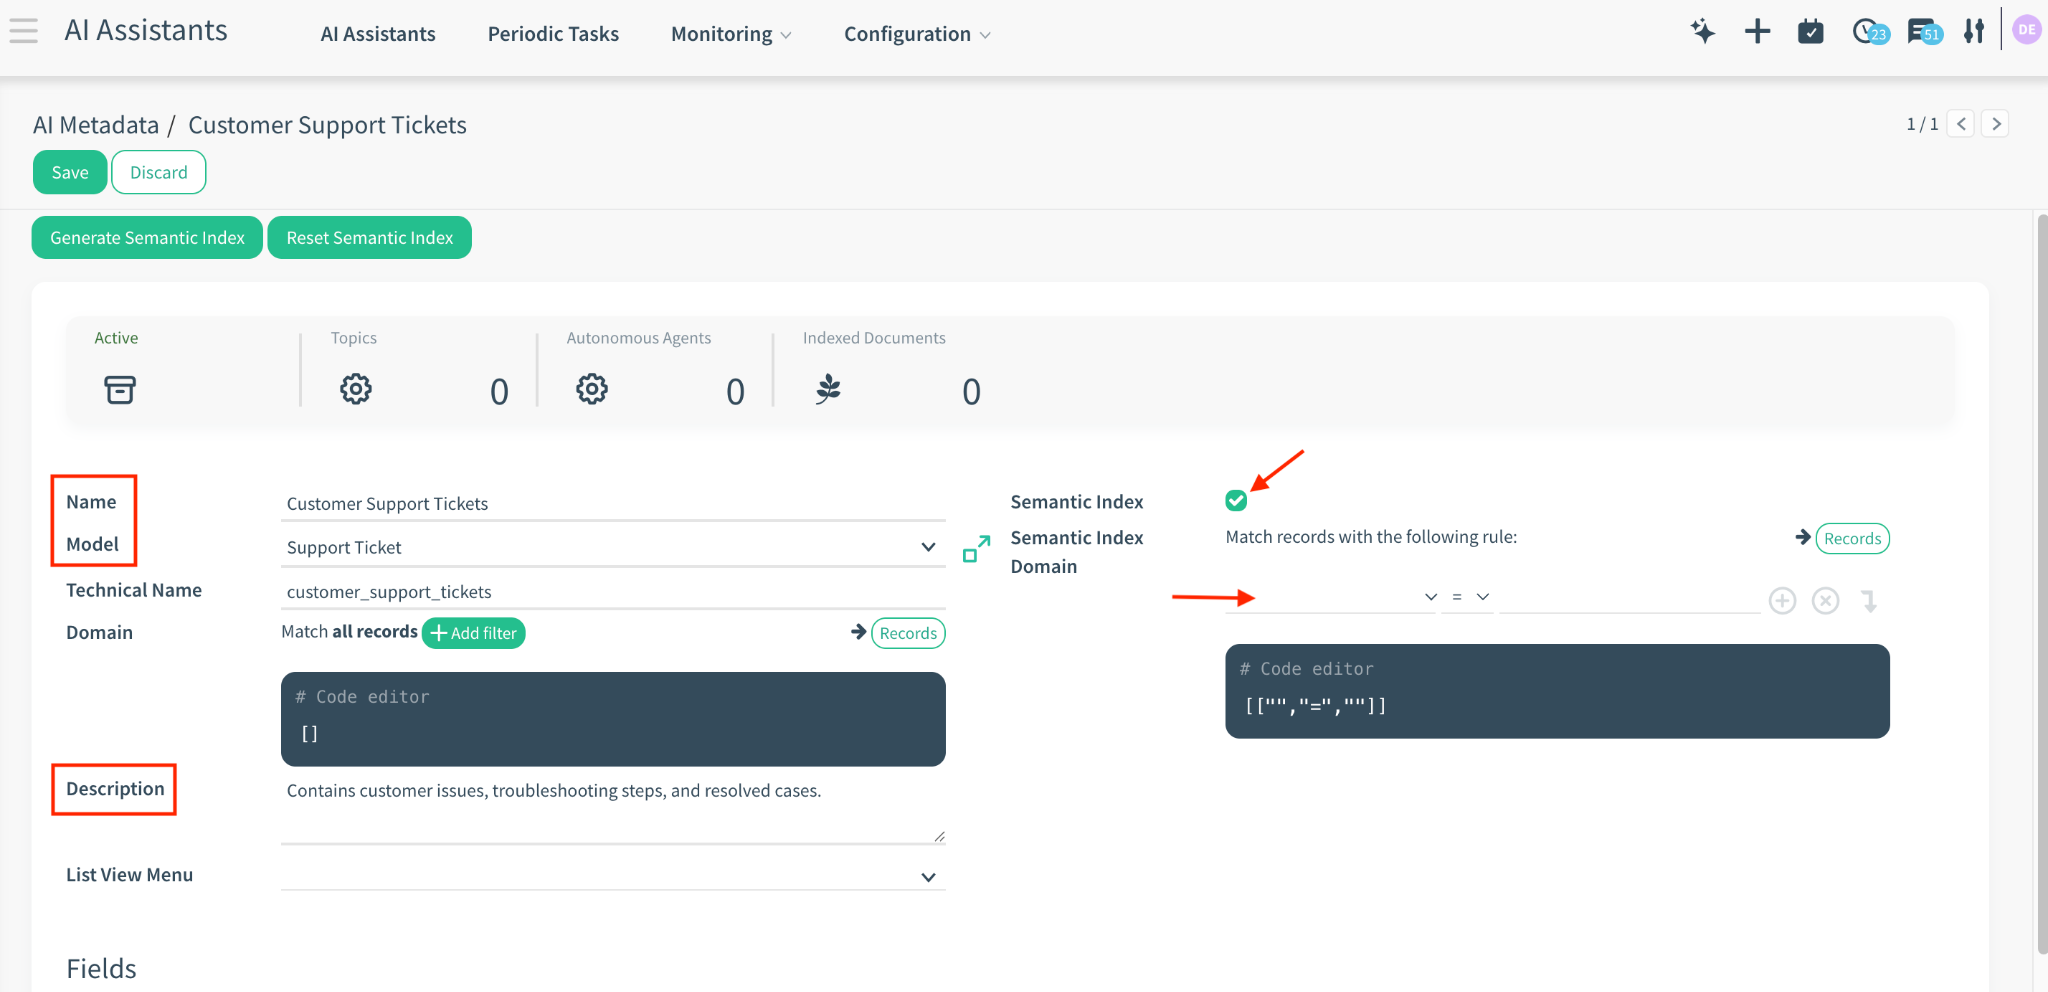
1. Click New to define a new knowledge source.
2. Name: Give it a name (e.g., “Customer Support Tickets”).
3. Model: Select the system model to index (e.g., website.support.ticket).
4. Description: Crucial: Enter a prompt describing what this data contains. The AI reads this to decide whether to search this model.
o Example: “Contains customer issues, troubleshooting steps, and resolved cases.”
5. Semantic Index Domain: (Optional) Add a domain filter to limit which records are indexed (e.g., [('active', '=', True)] to exclude archived records).
2.2 Field Configuration & Weighting
Once the model is defined, you must explicitly tell the AI which fields to read.
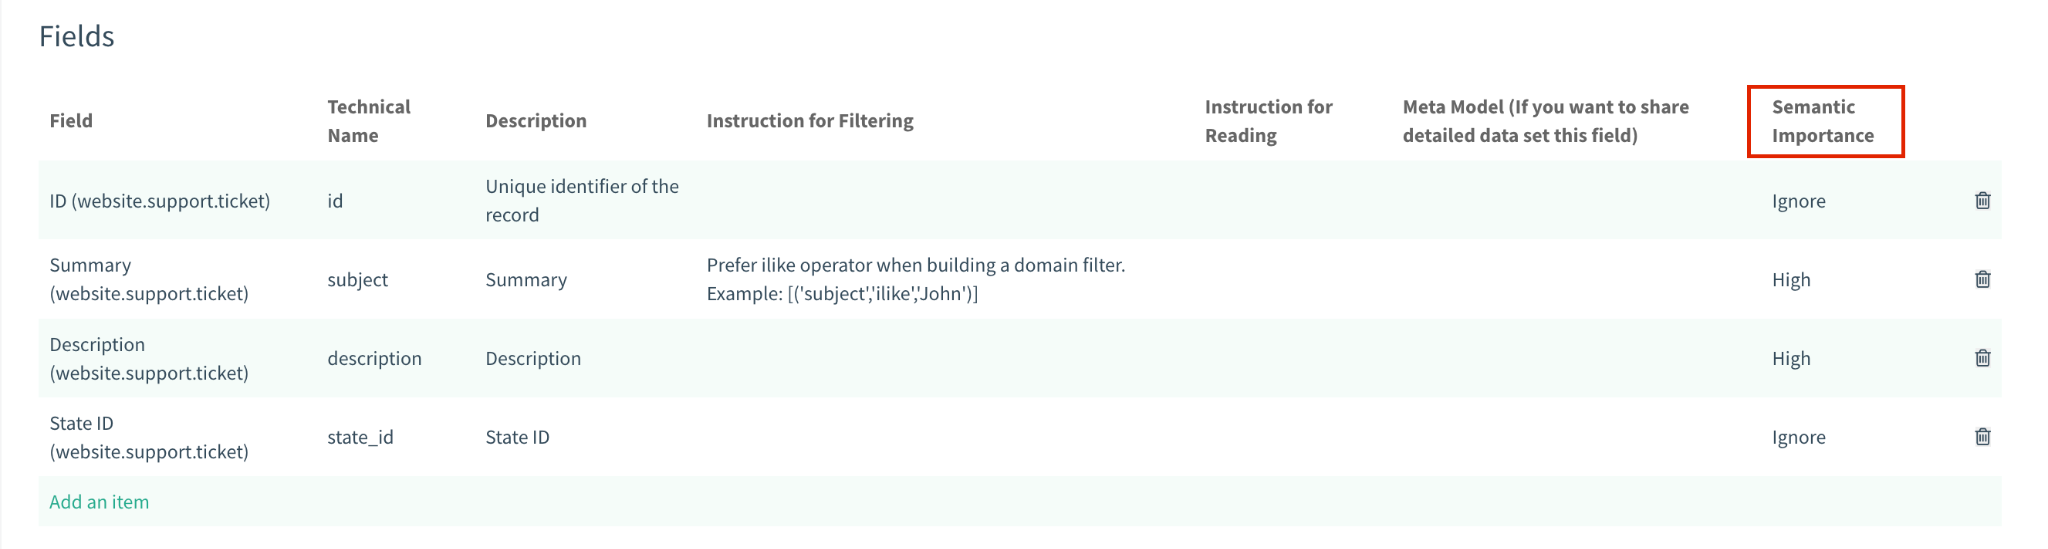
Go to the Fields section and click “Add an item”.
Field: Select the data column (e.g., summary, description, state_id).
Semantic Importance: Assign a weight to determine how much this field influences the search.
o High (3.0): Titles, Names, Key Messages.
o Medium (1.0): Standard body text, descriptions.
o Low (0.5): Contextual info (Dates, internal notes).
o Ignore (0): The AI can read this field if asked, but it will NOT use it to find the record during a search.
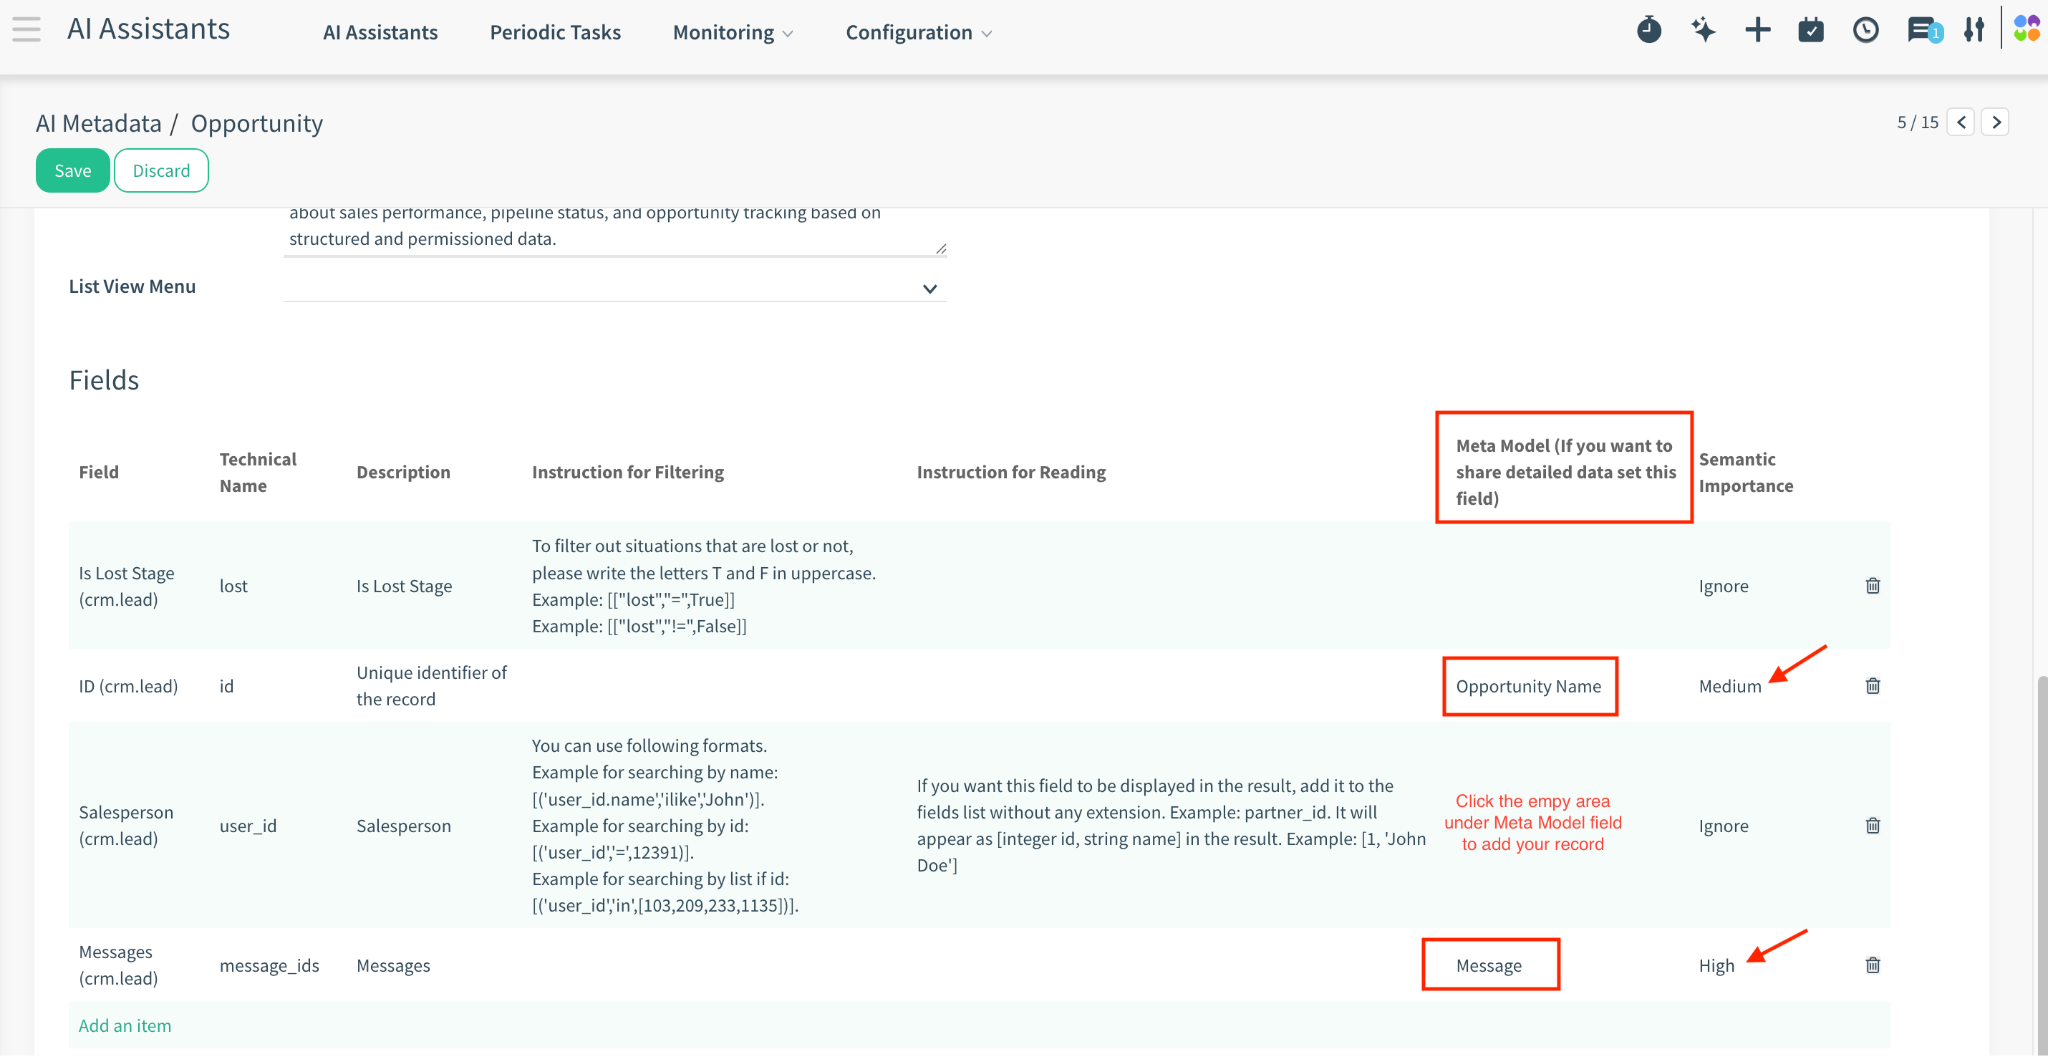
TIP: Using Meta Models (Relational Data): If you select a relational field (Many2one) that points to another Semantic Model (a “Meta Model”), the system calculates importance using an Average Logic: (Parent Importance + Child Importance) / 2
Why? This prevents unrelated keywords from hijacking the search. If a “Ticket” (High Importance) links to a “Company” (High Importance), the match is very strong. If the link is unimportant, the score is lowered.
Example: How Semantic Importance Works with Relational (Meta) Models
In CloudOffix, some fields are relational fields (Many2one). These fields link one record to another model, such as:
Ticket → Company
Opportunity → Customer
Opportunity → Messages (that are stored in the log chatter of the record (e.g., log notes, emails)
Invoice → Project
When a relational field points to another model that is also indexed by the Semantic Index, that model becomes a Meta Model.
For example, when you have an Opportunity record, the messages displayed on that opportunity actually come from the Messages model. The Opportunity record itself does not store the message content directly; instead, it stores references (IDs) to the related message records.
If you want to perform a semantic search on the message content associated with an Opportunity, the process works as follows:
First, the system looks at the Opportunity metadata to find the IDs of the related message records.
These message IDs act as a bridge between the Opportunity and the Messages model.
Using those IDs, the system then fetches the actual message content from the Messages model.
Finally, the semantic search is performed on the retrieved message content.
This two-step approach ensures that even though the message content lives in a separate model, it can still be semantically searched in the context of the Opportunity through relational metadata.
An Example Meta Model
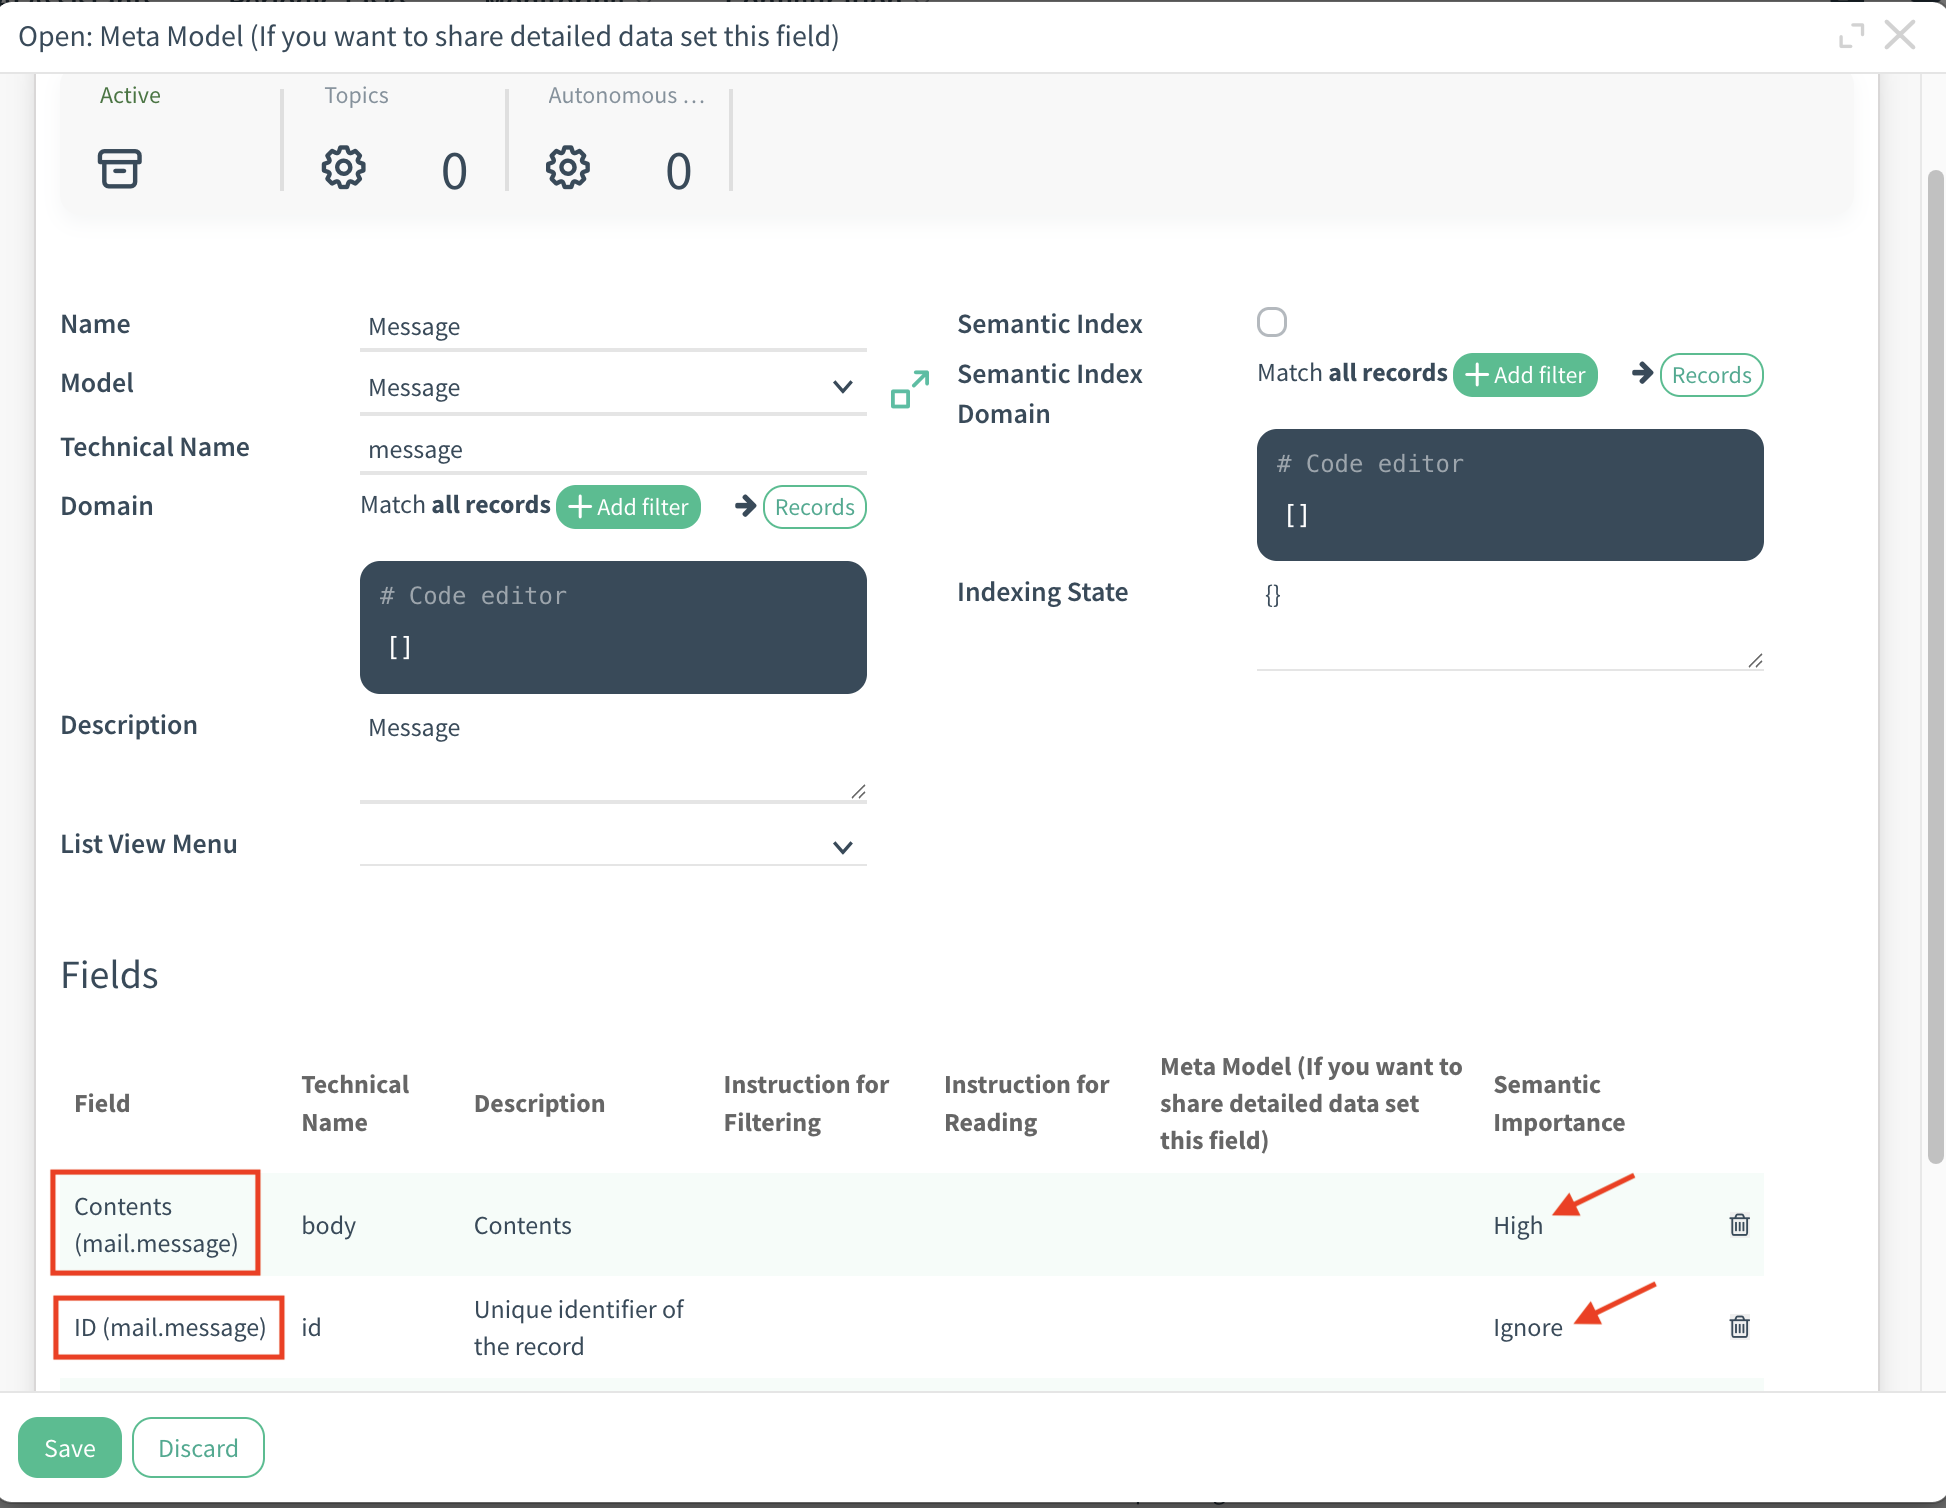
The Challenge: Preventing Irrelevant Matches
Relational data is useful for context, but it can cause a problem if not handled carefully.
Example:
A Helpdesk Ticket is linked to a Company named “ACME”,
but the ticket content itself is about a printer
failure, not about the company.
If the system gave full importance to the Company name:
The ticket could appear highly relevant for searches about “ACME”
Even if the actual problem described in the ticket is unrelated
This would reduce search accuracy
The Solution: Average Importance Logic
To prevent relational fields from dominating the search results, CloudOffix applies an Average Importance Logic when a Many2one field links to another Semantic Model.
Formula:
Effective Importance = (Parent Importance + Child Importance) / 2
This ensures that relational data supports the main content instead of hijacking the search relevance.
Practical Example
Ticket Model (Parent):
Description → High (3.0)
Company (Many2one) → High (3.0)
Company Model (Child / Meta Model):
Name → High (3.0)
Calculated Importance:
(3.0 + 3.0) / 2 = 3.0
Result:
The ticket is strongly relevant only if both the ticket
content and the linked company are meaningful for the
query.
Weak Relation Example
If the Company field is meant to provide context only:
Description / Ticket Importance → High (3.0)
Company (Many2one) / Company Importance → Low (0.5)
(3.0 + 0.5) / 2 = 1.75
Result:
The ticket can still be found, but the company name alone cannot push it
to the top of the search results.
Why This Matters
This logic ensures that:
The main record content always remains the primary signal
Relational data adds context instead of noise
Unrelated keywords from linked records do not distort search relevance
Semantic Search results stay accurate in complex CRM and Helpdesk data structures
2.3 Indexing Lifecycle & Automation
The index is not instant; it is built in the background to prevent slowing down the system.
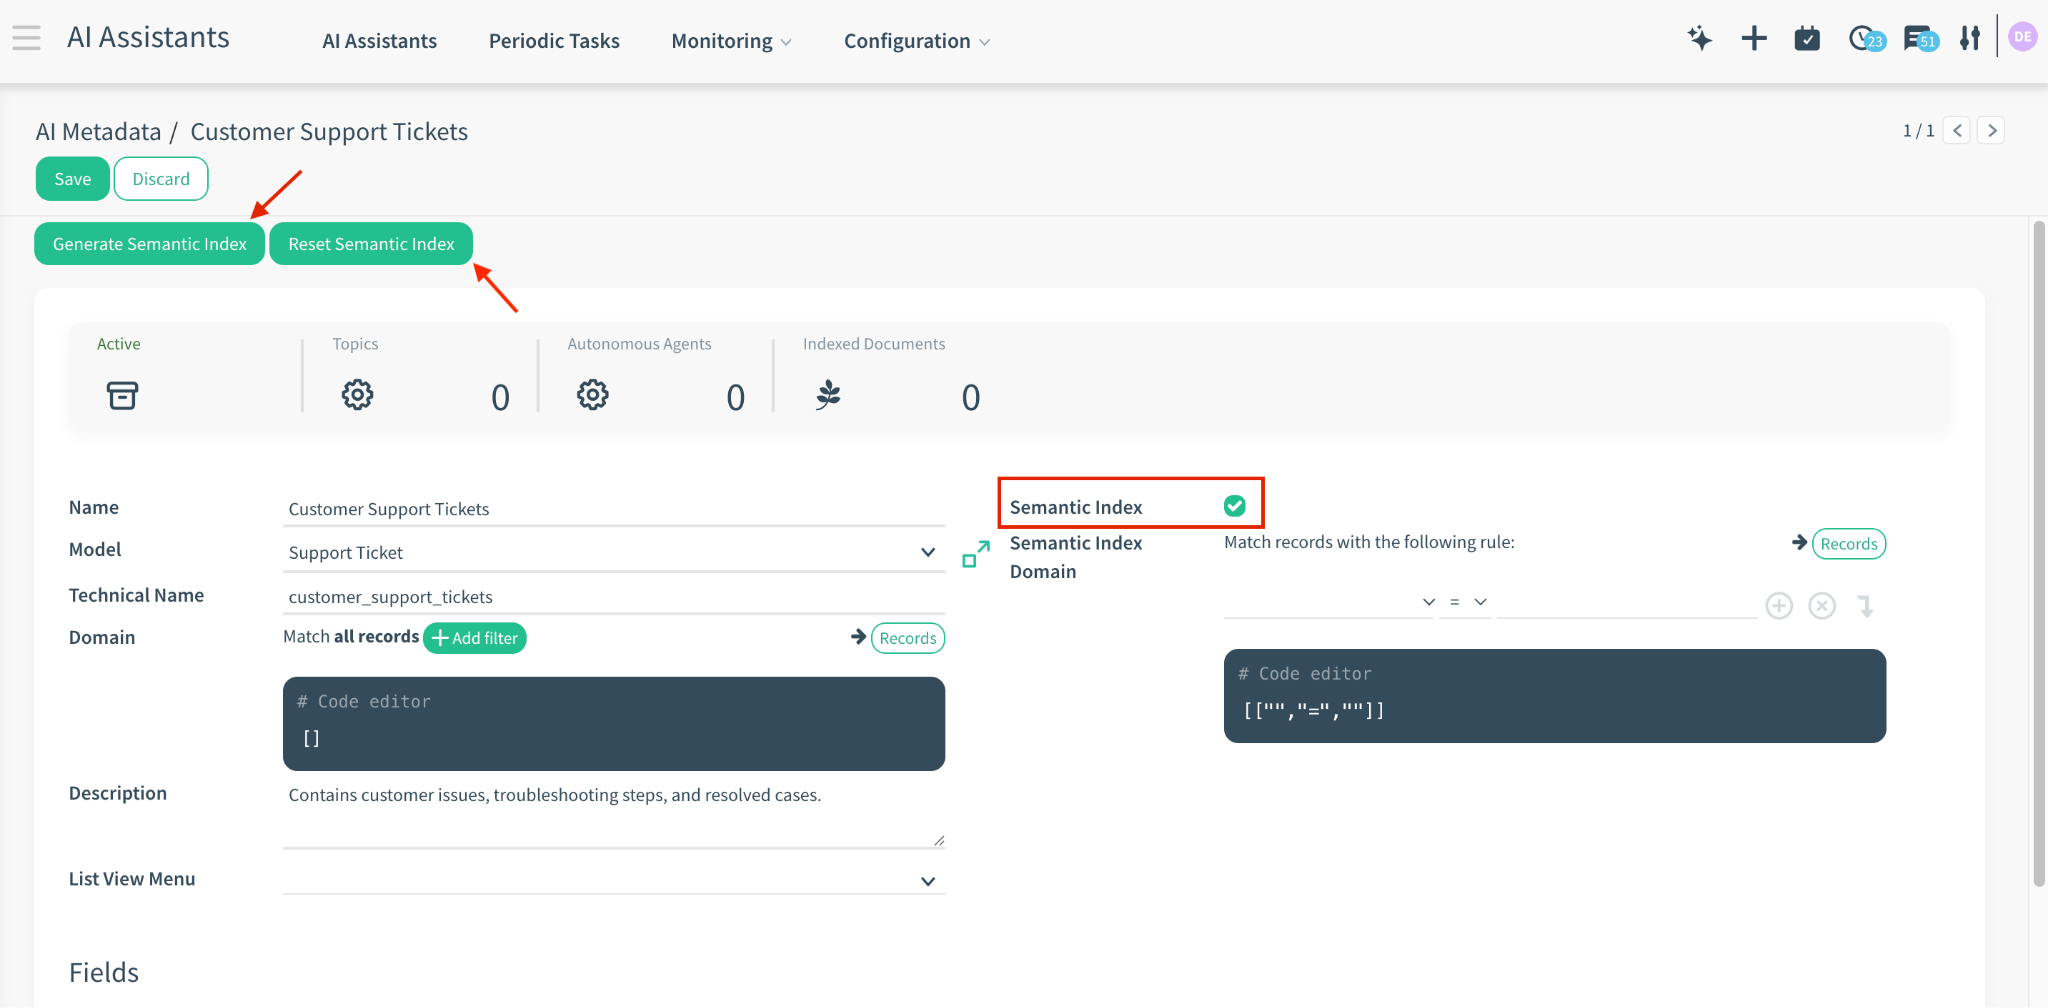
1. Check the Semantic Index box on the main form to enable this model.
2. Manual Trigger: Click Generate Semantic Index to force the system to index the next 10 records immediately (useful for testing).
3. The Cron Job: The automated action Build Semantic Index (ir_cron_ir_build_semantic_index) runs every 10 minutes to process the rest of the queue.
How Updates Work: When a record is modified, the system calculates a unique Hash of its content. If the content changes, it is marked for re-indexing automatically.
Resetting the Index (Important): The indexing process is “Incremental”—it only looks for records that have changed since the last scan. Therefore, if you change the Configuration (e.g., Add a new Field or Change the Domain), existing records will NOT automatically update because their “Last Write Date” hasn’t changed.
Action: Click the Reset Semantic Index button.
Result: This clears the “Indexing State” memory, forcing the system to re-scan and re-index all matching records from scratch during the next Cron Job functionality.
3. Integration with External Systems
You can connect CloudOffix to external document management systems (like M-Files) to include files (PDFs, Word Docs) in your AI search.
3.1 Configuration
First install the relevant module:
Apps > Search for “co_semantic_helper” > Install
Note: Please get in contact with the CloudOffix team to install this module.
After installing the module:
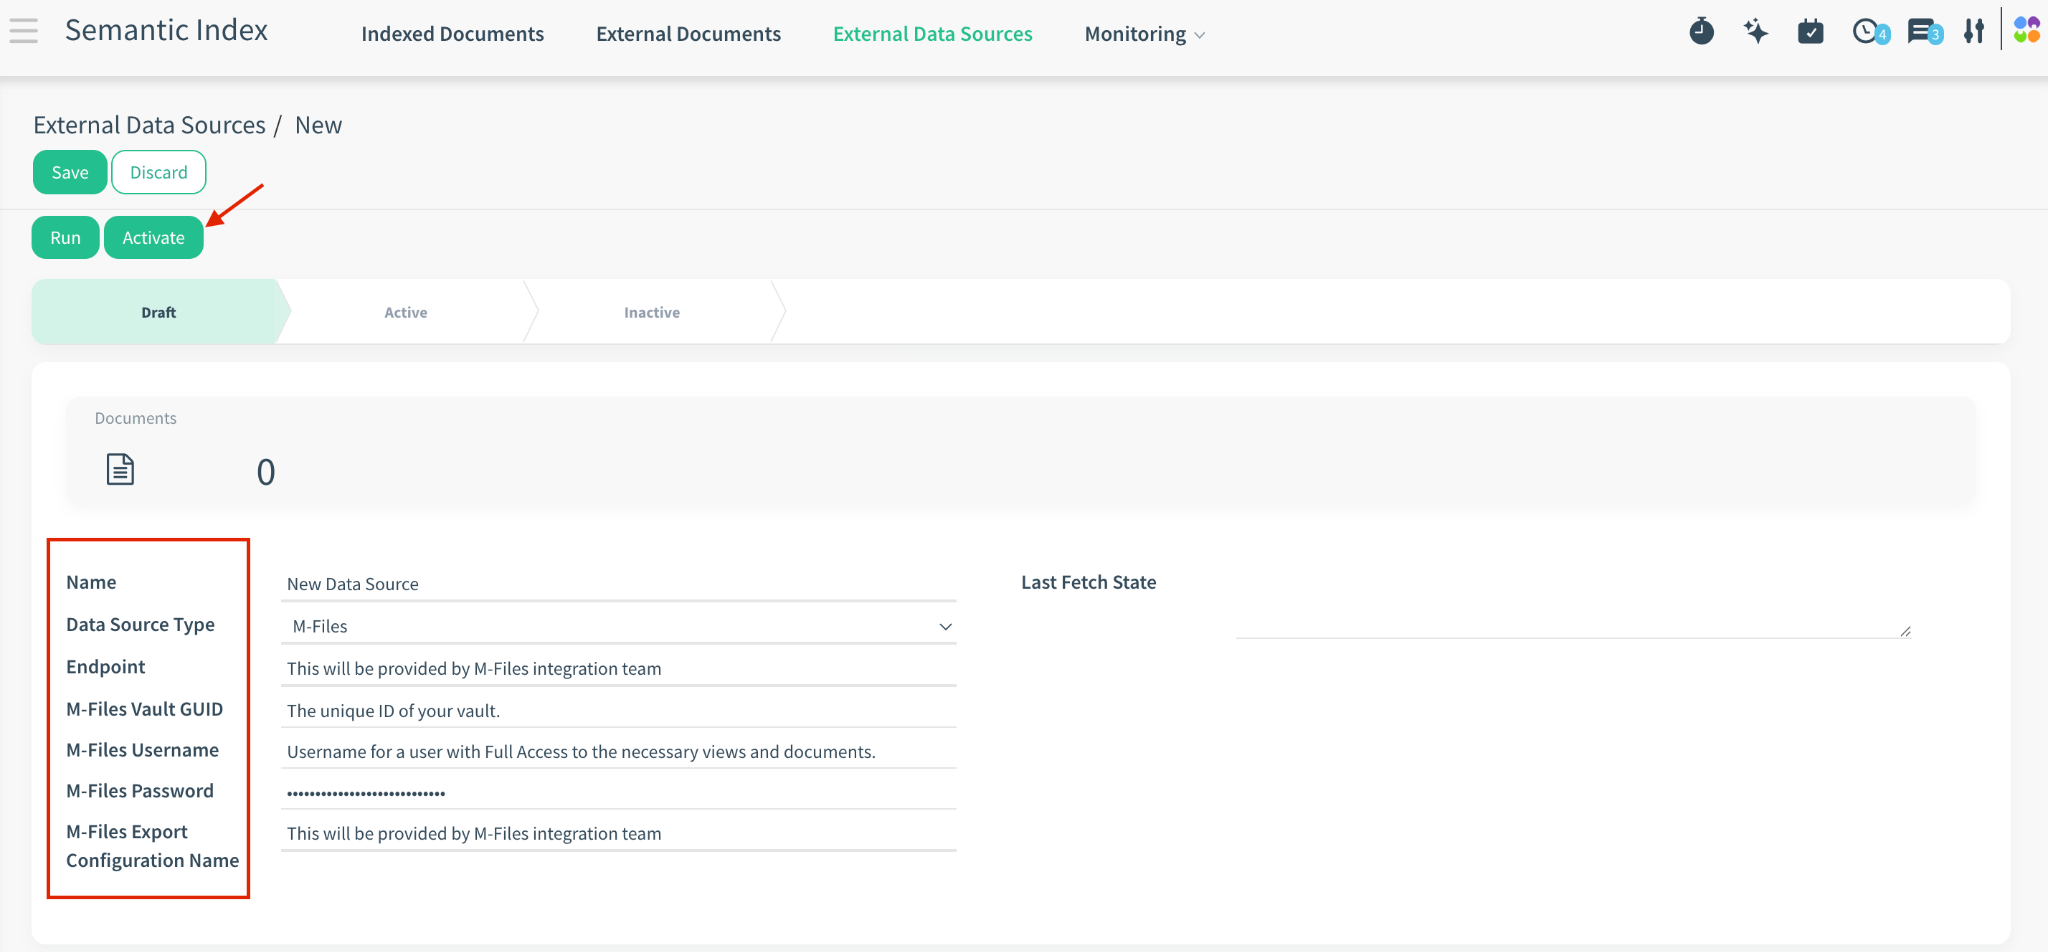
Navigate to Semantic Index App > External Data Sources (the related menu will be added after installing the module).

| Field | Description |
|---|---|
| Data Source Type | Select M-Files. |
| Endpoint | The API address of your M-Files vault (Provided by M-Files integration team). |
| M-Files Vault GUID | The unique ID of your vault. You can extract this from your M-Files Web URL. Example: vault/{4725D921-7772-41E4-9B6E-7205C90D15C7} |
| M-Files Username | Username for a user with Full Access to the necessary views and documents. |
| M-Files Password | Password for the above user. |
| M-Files Export Configuration Name | The name of the specific export configuration ID (Provided by M-Files integration team). |
3.2 Processing & Activation
Once configured, the documents pass through a strict lifecycle managed by background jobs.
A. Fetching Phase
1. Activate: Set state to Active locally by clicking the “Active” button.
2. Fetch Job: Semantic Index: Fetch runs every 10 mins.
3. Result: Creates a record in the External Documents menu with status “Pending”.

B. Processing Lifecycle
The Semantic Index: Progress job moves documents through these states:
Pending > Ready: The system executes the Conversion Pipeline. It reads the file, converts logic to Markdown, and prepares a JSON structure (“Vector Payload”) containing weighted text blocks.
Ready > Indexed: The system calculates Vectors for the text. It computes a Hash to check for duplicates. If new, it writes to the document_embedding table.
Indexed > Cleaned: To save space, the system removes the temporary binary file and the heavy Vector Payload, keeping only the final index. The status is set to Cleaned (Done).
The Conversion Pipeline (Smart Handling): The system intelligently decides how to read the file to optimize for cost and accuracy:
Office Documents (Word/Excel): Processed natively (Free/Fast).
Digital PDFs: Processed natively. If < 500 chars found (Scanned PDF), it auto-upgrades to AI.
Images / Scanned Documents: Handled by the Autonomous Agent.
4. Storage & Chunking (The Index)
Where does the data actually go?
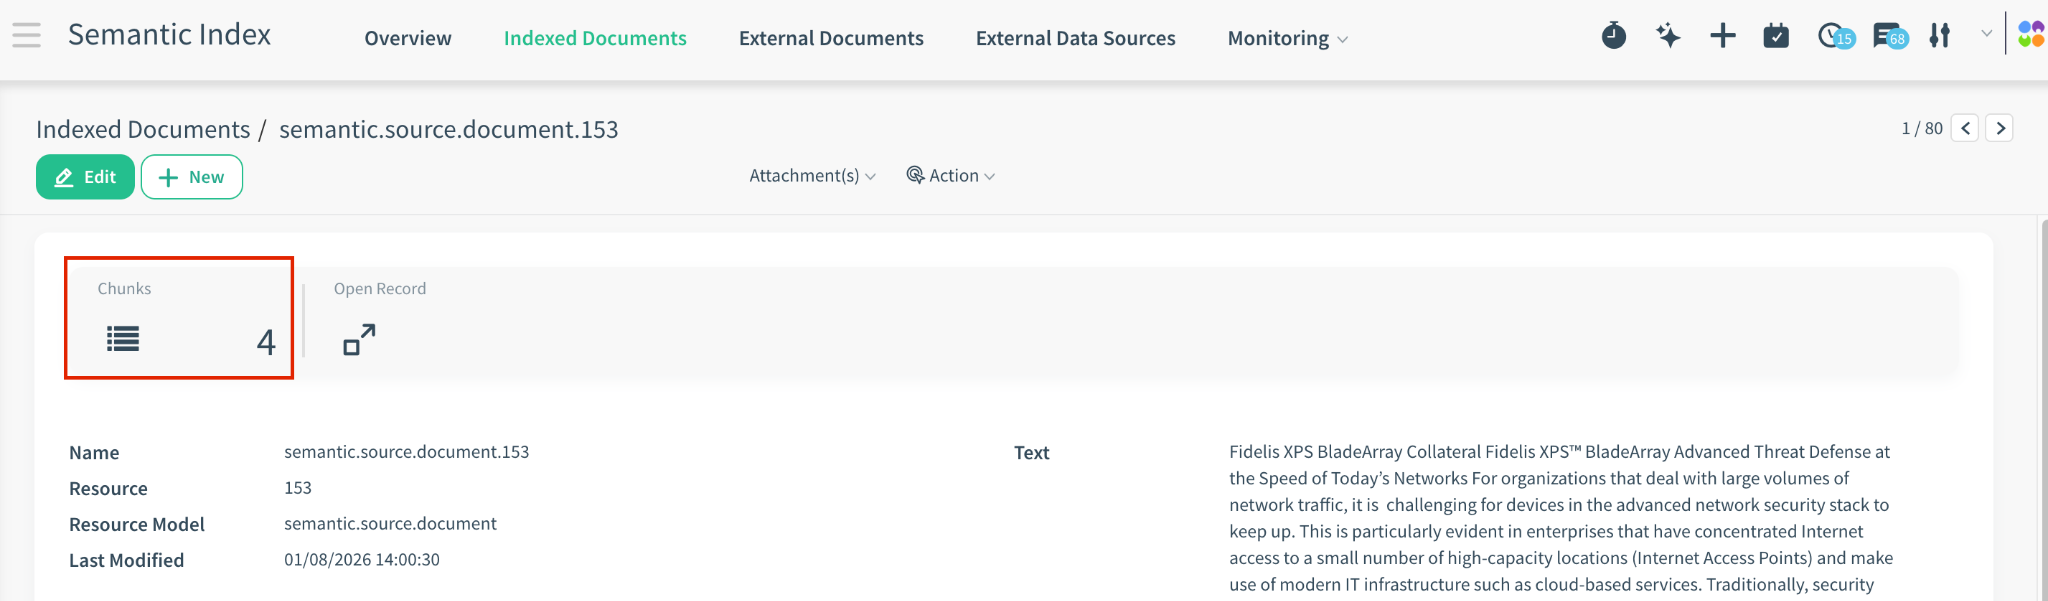
You can view the final result in Semantic Index App > Indexed Documents.
This view shows the document_embedding table, which is the “Brain” of the system.

4.1 Understanding Chunking
AI models have a limit on how much text they can understand at once. Therefore, the system splits long documents into smaller, digestible pieces called Chunks.
Chunk Size (512 Tokens): A typical page of text is broken down into blocks of roughly 400 words.
Overlap (128 Tokens): This is the most critical part. When splitting text, the system does not just cut it cleanly. It repeats the last ~100 words of “Chunk A” at the beginning of “Chunk B”.
Why Overlap Matters? (The “Bridge” Concept) Imagine a sentence that splits exactly at the chunk limit:
Chunk A ends: “The most important safety rule is…”
Chunk B starts: “…to always wear a helmet.” Without overlap, the semantic meaning is destroyed. Chunk A has the “Rule” but no detail; Chunk B has the “Advice” but no context.
Overlap acts as a bridge, ensuring that context flows smoothly across the cut, so no meaning is lost.
4.2 Finding the “Needle” (Chunk Retrieval)
When you search for “How to configure the firewall settings?”, the system does not look for a whole document named “Manual.pdf”.
It searches through millions of distinct Chunks (Paragraphs).
It finds the exact Chunk (e.g., Page 45, Paragraph 3) that discusses “Firewalls”.
It retrieves that specific piece of text and traces it back to the parent document.
Result: This allows the AI to answer specific questions accurately because it is looking at a focused 400-word block, not getting lost in a 500-page manual.
5. The Search Logic (Data vs. Context)
It is important to understand that the system has Two Brains for searching, and it can use them individually or together (“Hybrid Mode”).
| Feature | Data Retrieval (Left Brain) | Semantic Search (Right Brain) |
|---|---|---|
| Tool Used | search, read_group | semantic_search |
| Logic | Exact Match (SQL) | Meaning Match (Vector) |
| Example | “Show me tickets created today” | “Show me tickets about login errors” |
| Best For | Counting, Filtering Dates, IDs, Authors | Researching, finding solutions, vague queries |
5.1 Hybrid Search Mechanics
The power of CloudOffix is that the Agent can combine these logics in a single request.
User: “Find me high priority tickets about printer failures.”
Quick Tip: Users do not need to provide a list of keywords. The AI extracts the “Concept” (Printer Failure) from the natural language sentence.
The Hybrid Execution Step-by-Step:
Stage 1: SQL Filter (Left Brain) The AI identifies “High Priority” as an explicit filter (priority = '3'). It runs a standard database search (secure_search) to find all Ticket IDs that match this criteria.
Result: A list of, say, 100 relevant IDs.
Stage 2: Vector Injection (Right Brain) The system takes this list of IDs and injects them directly into the Vector Search Query using a WHERE id IN (...) clause.
Stage 3: Targeted Semantic Search The Vector Engine now searches for “Printer failures” only within those 100 IDs.
o Result: It finds the 5 tickets about printers that are ALSO high priority.
Why is this superior?
Efficiency: It does not waste time searching low-priority tickets.
Accuracy: It guarantees that every result respects your strict business rules (Priority), while providing the fuzzy flexibility of AI (Topic).
6. Automation & Technical Details
The system relies on a suite of Scheduled Actions (Cron Jobs) to maintain the knowledge base intact.
| Scheduled Action Name | Tech ID | Purpose |
|---|---|---|
| Semantic Index: Fetch | ir_cron_semantic_doc_progress_fetch | Scans Active Data Sources (M-Files) and creates semantic.source.document records. |
| Semantic Index: Progress | ir_cron_semantic_doc_progress | Processes Pending documents, runs Hybrid Conversion Pipeline, and builds the index. |
| Build Semantic Index | ir_cron_ir_build_semantic_index | Scans internal CloudOffix records for content changes and updates the index automatically. |
| Run periodic tasks | ir_cron_ir_periodic_task | Executes user-scheduled prompts (e.g., “Summarize my emails every morning”). |
| Autonomous Agent Tasks | ir_cron_ai_auto_runs | Background processor for general Autonomous Agent activities. |
7. Ready-made Resources
The system comes with pre-installed resources to help you get started immediately. These are defined in the module data files and are ready to use.
7.1 Default AI Topics (Intents)
AI Assistants > Configuration > AI Topics > External Document Search
| Topic Name | Purpose | Actions Defined |
|---|---|---|
| External Document Search | Specialized topic for handling user queries related to external files (M-Files). | document_semantic_search, get_document_text |
7.2 Specialized Semantic Actions
AI Assistants / Autonomous Agents > Configuration > AI Actions
These tools are automatically available to the AI when searching external documents:
document_semantic_search: Performs the vector search and retrieves document names and URLs.
get_document_text: Allows the AI to read the full content of a specific document if the summary is not enough.

7.3 Autonomous Agents
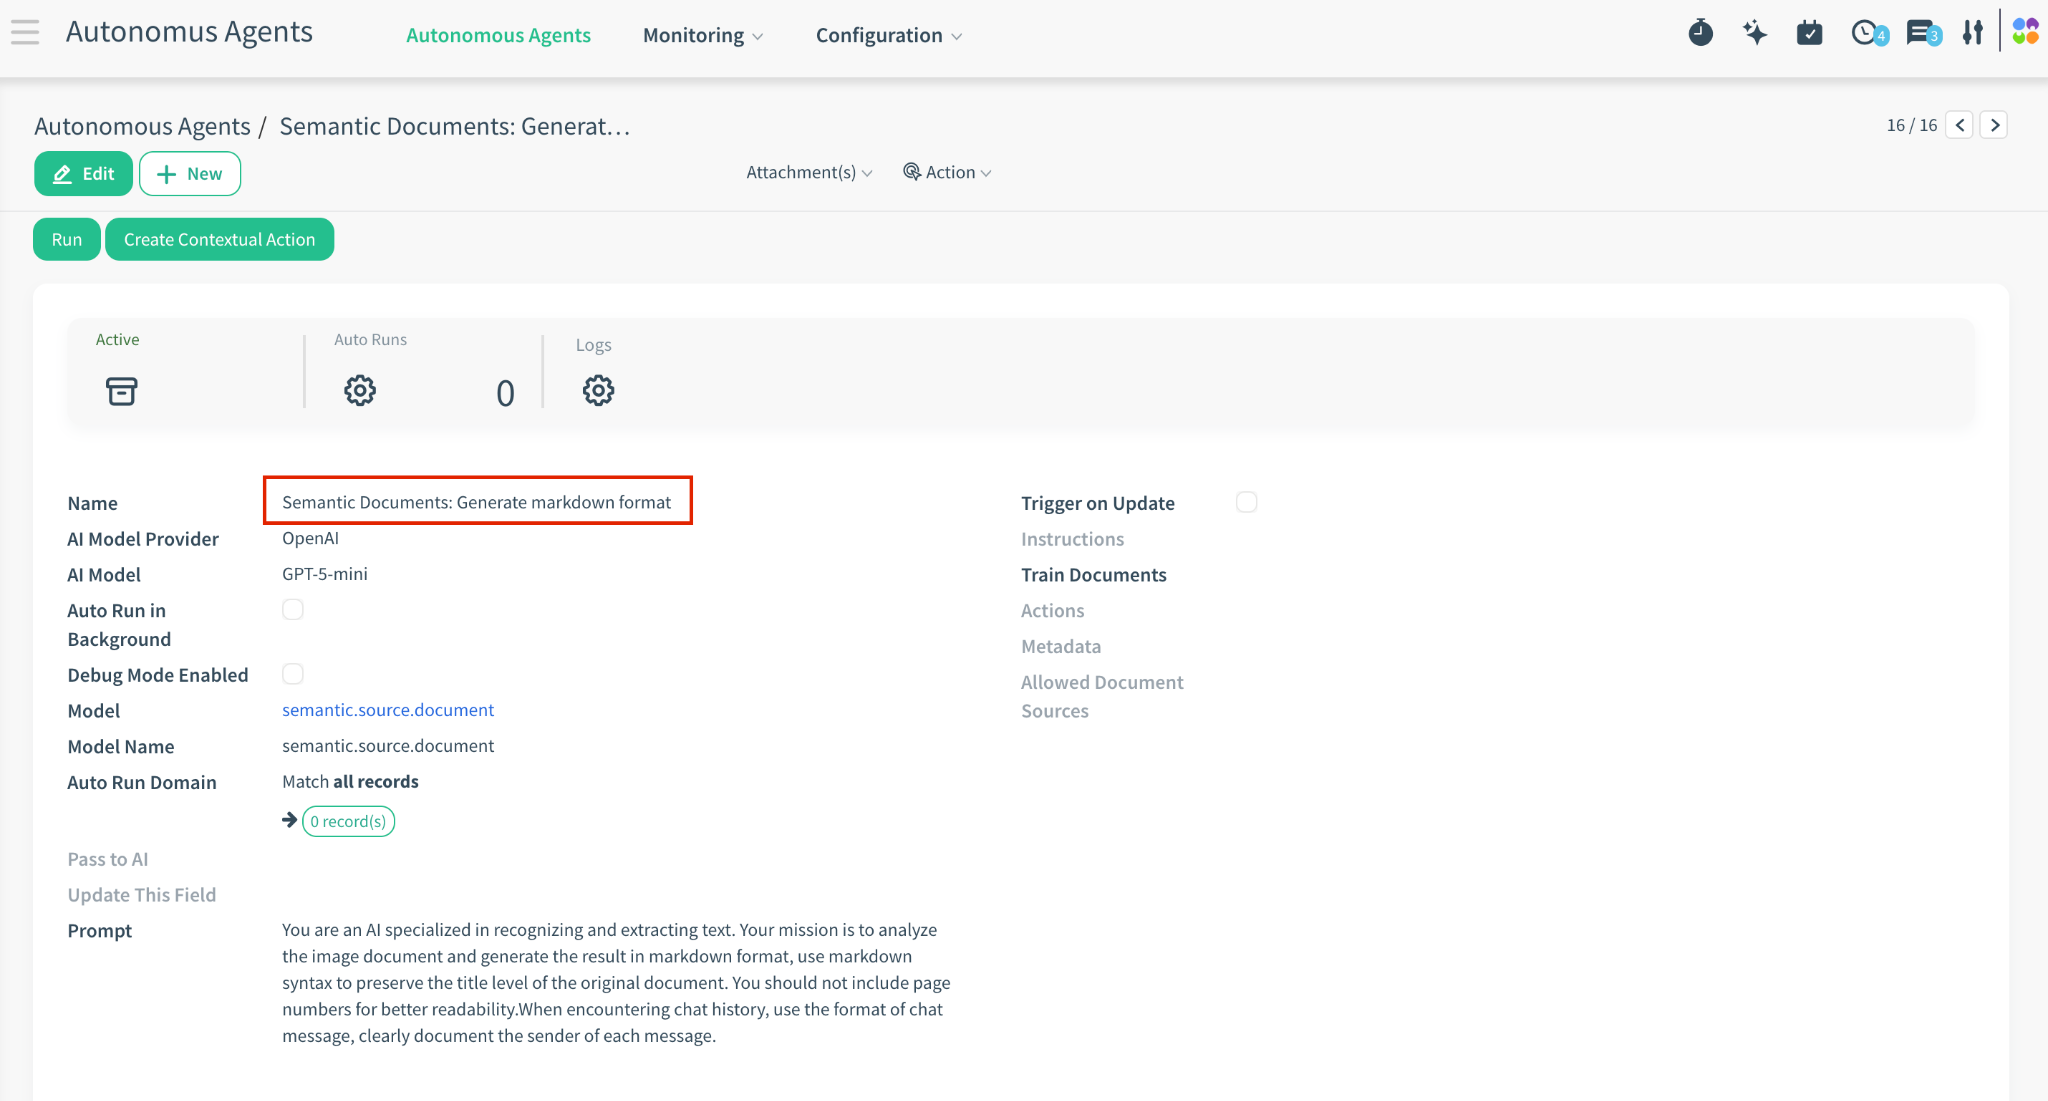
Autonomous Agents > Semantic Documents: Generate markdown format
Name: Semantic Documents: Generate markdown format
Purpose: The intelligent agent responsible for converting images, scanned PDFs, and complex layouts into clean Markdown for indexing.
Trigger: Automatically called by the Semantic Index: Progress cron job when a visual document is detected.
8. Troubleshooting
“Where are errors logged?”
Technical errors (e.g., AI Connection issues) are logged in the AI Logs (ai.log) menu.
Retention Policy: The system automatically deletes logs older than 15 Days to save space.
“The AI says ‘I don’t know’ but the record exists”
Check Semantic Importance. If the field containing the answer is set to Weight 0, the AI cannot “see” it during the search phase.
Check the Semantic Index Domain. Ensure the record is not filtered out (e.g., is it Archived?).
“New records are not showing up immediately”
The Build Semantic Index cron job runs every 10 minutes.
Immediate Fix: Go to the AI Assistants > Configuration > AI Metadata > Select the relevant record and click Generate Semantic Index to force an update.
“I added a new field but old records do not show it”
The system only scans modified records. If you change the structure (Metadata), you must click Reset Semantic Index to force the system to re-read old data.
“M-Files documents are stuck in Pending”
Verify that the Semantic Index: Progress cron job is Active.
Check the logs to see if the Autonomous Agent (Semantic Documents: Generate markdown format) is hitting any limits or errors (especially for huge scanned PDFs).